To keep grout white through a Toronto winter, stop slush and grit at the door, remove tracked-in residue before it sits in grout lines, and clean with a product suited to your tile or stone. In the bathroom, reduce standing water and watch for failing caulking. If the grout stays dark after careful cleaning, find out whether it needs a deep clean, a repair or a colour refresh rather than scrubbing harder.
White grout is most vulnerable where winter habits concentrate water and soil: entry floors, busy kitchens and showers that dry slowly. A boot tray and a clean mop can prevent much of the visible buildup. Neither will fill a missing grout joint or fix a gap in the caulking. At Team Grout, we separate those problems before recommending work, so homeowners can aim for a fresher appearance and easier maintenance without paying for a treatment that misses the cause.
Start with the routine below. If it is not enough, an assessment can establish what your particular floor or shower needs. A quote can then set out the proposed work, price and return-to-use instructions.
What makes white grout look grey in winter?
Grout is the material filling the joints between tiles. It has a different texture from the tile face, and some grout is absorbent. That is why a smooth tile can wipe clean while the pale line beside it holds onto dirty water. The condition of those lines matters as much as the colour you started with.
Toronto winter adds a familiar mix to entryways: wet boots, tracked-in grit and residue from treated streets and walkways. When snowmelt crosses a tiled foyer, it carries that material toward the grout. Mopping without first removing the grit can push dirty water along the joints. In a shower, the winter problem is different. Regular use, soap film and water lingering in corners can make light grout look uneven, particularly if the room dries slowly.
There is an important distinction between discolouration and deterioration. A sound grout line may simply contain soil that needs more thorough cleaning. A cracked, pitted or partly missing line may still look dark afterward because damaged areas collect material and reflect light unevenly. If a floor never seems properly clean, inspect the grout before assuming the tile needs replacing.
A practical routine for white grout on winter floors
1. Catch slush before it reaches the tile
Put a mat where footwear enters and a boot tray where wet shoes come off. Choose a layout that actually fits how people use the door. If the tray sits across the room, melting boots will cross the grout before reaching it. Empty collected water and clean the mat when it becomes saturated; a wet mat should not become the next source of dirty water.
Check the route from the door to the tray, especially after snow or freezing rain. Wipe up visible puddles rather than waiting for them to dry into a pale or greyish film. This small step does more for white entryway grout than an occasional aggressive scrub.
2. Remove grit before adding water
Vacuum or sweep with a tool suitable for the floor, concentrating on the first few tiles inside the entrance and the edges of mats. Then damp-mop. If grit stays on the floor, a wet mop moves it around rather than removing it cleanly. Pay attention to recessed or textured tile, where debris can remain even when the grout looks like the only problem.
3. Mop with the right cleaner and clean water
Use a cleaner labelled for the surface you have and follow its dilution and rinsing directions. A mild, pH-neutral product is a sensible routine choice for compatible tile and grout, and a stone-safe, acid-free product matters if the floor contains marble, limestone, travertine or another acid-sensitive stone. Do not assume a bathroom descaler or vinegar is suitable for every tiled floor.
Work in sections small enough that you can rinse or change the mop water before it turns visibly dirty. If the cleaner calls for rinsing, make a final pass with clean water. Dry lingering puddles, particularly where the floor meets a wall or cabinet. If grout looks grey again as soon as the floor dries, compare a lightly used area with the busy route from the door. That can help you tell ongoing traffic from a stain or damaged joint that needs a closer look.
4. Check the grout instead of repeating the same scrub
Once the floor is clean and dry, look along individual lines in good light. Are they intact but darker in high-traffic spots? Are there small holes, cracks or missing sections? Does the colour vary even away from the entrance? These observations point to different solutions. More force is not a repair, and a stiff tool used without regard to the surface can create another problem.
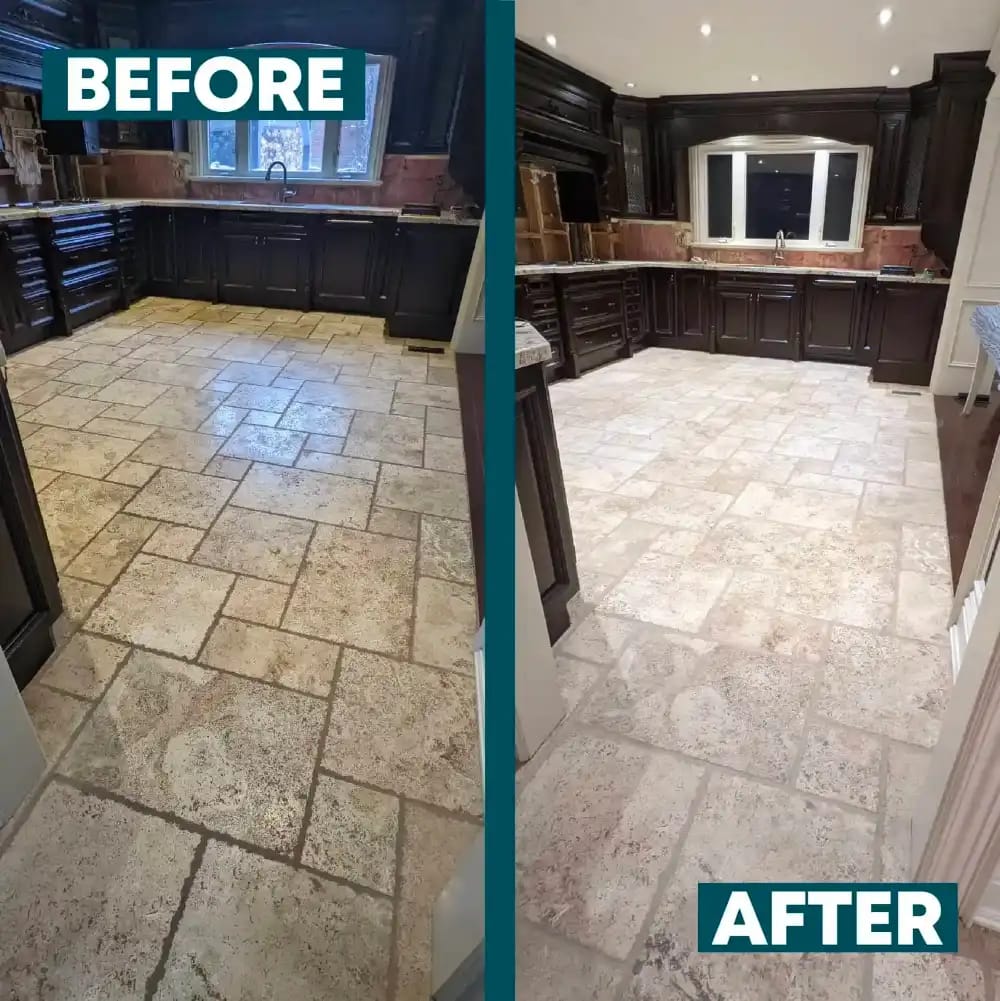
The same approach helps in a winter kitchen. Tracked-in soil may be part of the story, but cooking grease and food spills can also accumulate in floor grout. Identify where the buildup is coming from before choosing a cleaner. For a deeper explanation of service scope, see our post on what grout cleaning with sealing includes.
Keep shower grout bright when the bathroom dries slowly
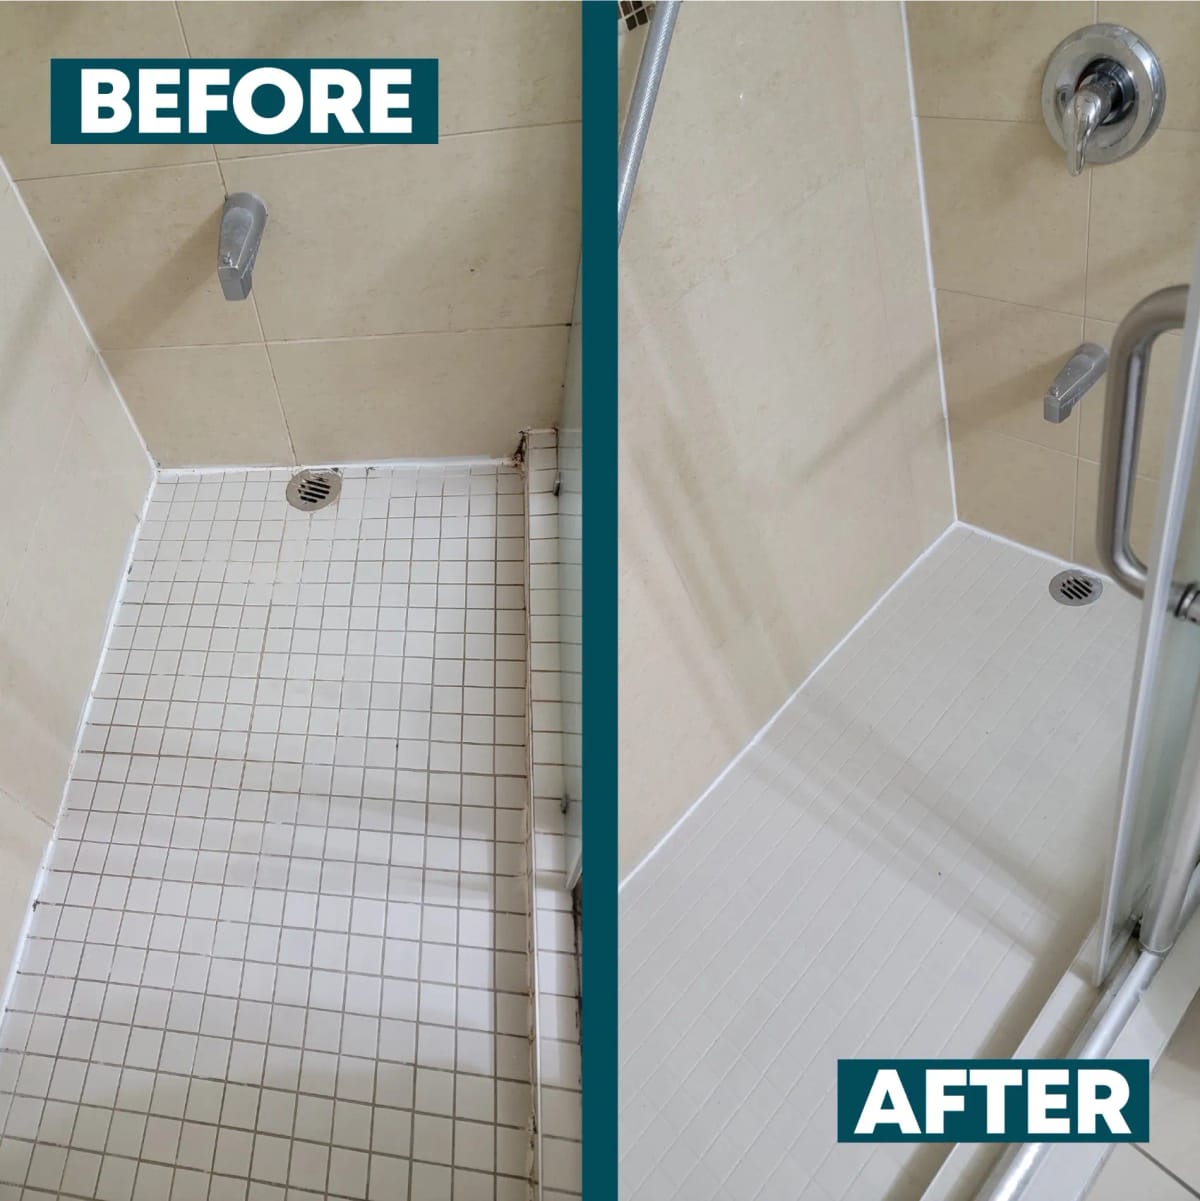
An entry floor needs help with boots. A shower needs help with water that stays after use. Where practical, squeegee tile and glass, wipe water from ledges or niches, and use the bathroom ventilation so wet surfaces can dry. Give particular attention to the shower-floor perimeter and the joint where the wall meets the tub or base. These are easy places to overlook when the centre of the tile looks clean.
Look at the caulking while you are there. Caulk serves a different purpose from the grout between tiles. If it has pulled away, cracked or developed gaps, cleaning its surface will not restore the failed joint. Mould staining embedded inside old silicone also generally calls for replacement, not another round of surface cleaning. A fresh bead is not a fresh start if failed caulk stays underneath.
Proper caulking replacement involves removing the old material completely, cleaning and drying the exposed joint, then applying a suitable new bead. That preparation matters. Covering a failing joint can trap moisture and leave the new material without a sound surface to bond to. Likewise, a nicely cleaned shower floor is not the whole answer if its grout has missing sections. Getting the tile, floor joints and caulking right now helps avoid repeating the cosmetic work later.
If dark marks or a musty smell keep returning, or moisture appears beyond the shower, do not treat colour sealing as a leak repair. Surface work addresses accessible grout, tile and joints. Recurring cracks, mould or odours can signal a condition that needs further investigation before finishing work is chosen. For more on the distinction, read how cracked shower grout and deteriorated caulking are addressed.
Which treatment actually keeps white grout looking better?
We use a simple decision sequence: clean what is sound, repair what is damaged, then consider protection or a colour finish where suitable. The order matters. Applying a finish over dirt or a failed joint does not make the underlying problem disappear.
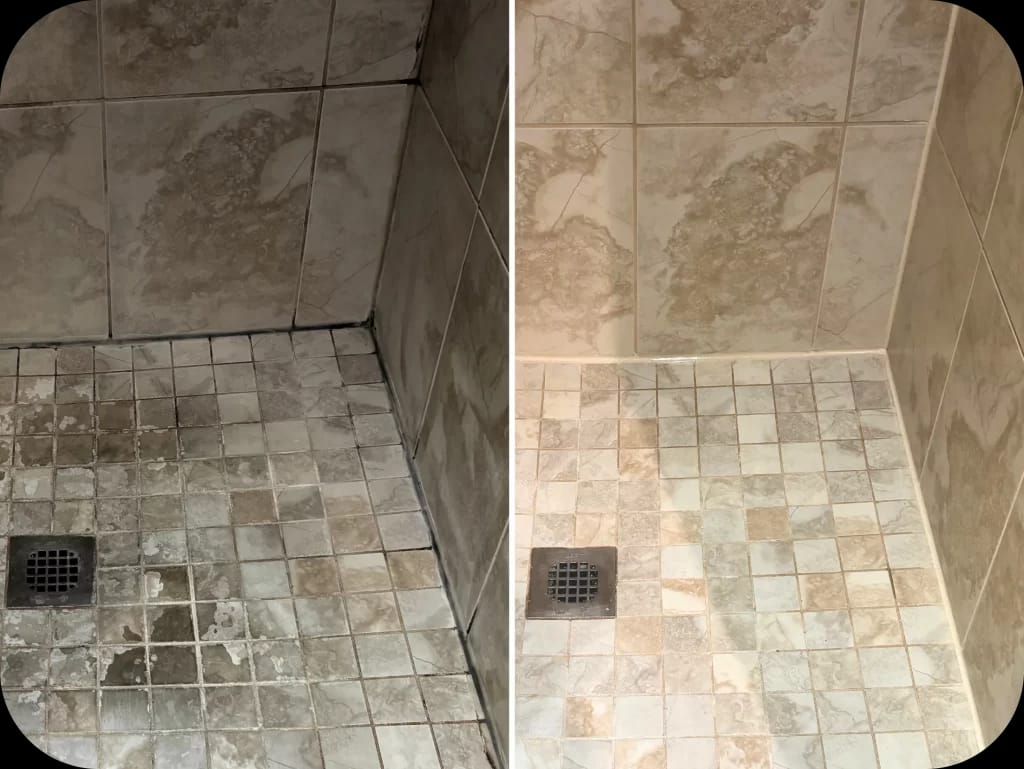
Deep cleaning for intact, dirty grout
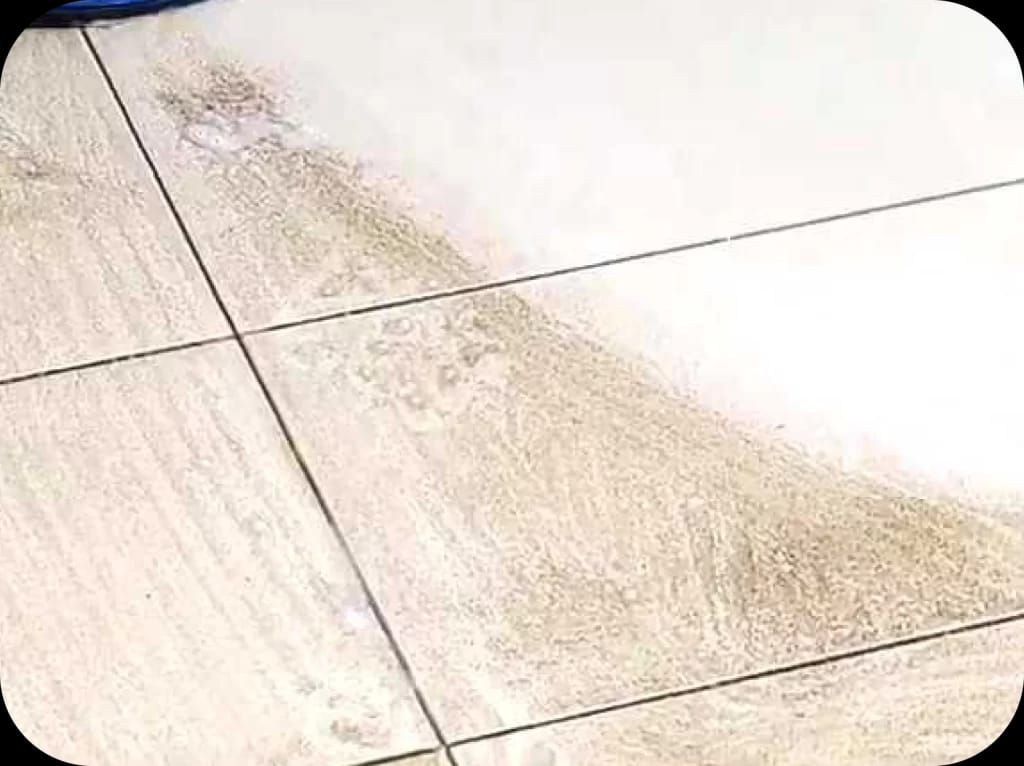
Professional tile and grout deep cleaning is the starting point when the grout is sound but ordinary mopping leaves embedded soil. Team Grout uses suitable cleaning products and machine-powered bristle brushes on appropriate surfaces, then applies clear sealer as part of its tile-and-grout-cleaning process. The method is matched to the material rather than treating ceramic, porcelain and natural stone as interchangeable.
Cleaning can refresh grout obscured by winter traffic or bathroom buildup. It cannot fill a crack, replace missing grout or change a colour that has been permanently altered. That is why an intact line and a damaged line should not receive the same quote simply because both look grey.
Grout repair and restoration for cracks or missing sections
When lines are pitted, cracked or missing in places, restoration can address them individually. The work may include cleaning, filling damaged areas and applying a grout colour sealer for a more consistent appearance. Structurally sound tile can often stay in place, subject to the condition of the floor or shower. Before you buy new tile, get an answer about the tile you already own.
Repair is especially relevant when one part of an otherwise clean white floor still draws the eye. The tile may be fine. The grout is stealing the spotlight. If damage keeps returning, however, it is worth understanding why before assuming another surface repair will hold.
Clear sealing or colour sealing for different goals
Clear penetrating sealing helps compatible absorbent grout, tile or stone resist staining while keeping its existing appearance. It is worth considering when you like the current grout colour, including on a suitable new or recently restored surface. It does not conceal stubborn discolouration, make an entire floor or shower waterproof, or prevent every future stain.
Grout colour sealing coats compatible grout lines with a coloured finish. It suits grout whose colour is uneven or no longer gives you the look you want, and it also offers stain resistance. It is not the same as a clear penetrating sealer, nor is it a reason to coat every tile. The short version is: like the colour, assess clear protection; want a more consistent white, assess colour sealing. Neither treatment replaces necessary repairs.
If you are deciding between them, our guide to choosing a grout sealer for a Toronto home explains the considerations in more detail. Suitability still depends on the material, existing treatments and condition of the grout.
Caulking replacement or combined shower restoration
If grout is sound but silicone is peeling or gapped, caulking replacement may be the focused job. If the shower also has buildup, damaged grout and uneven colour, a combined restoration may be a better scope. It can bring together deep cleaning, treatment of affected accessible surfaces, appropriate grout repairs, colour sealing and removal and replacement of failed caulking. The assessment determines which steps belong in the quote.
What real projects tell us, and what they do not
Homeowners often ask whether existing tile can look refreshed without demolition. The answer depends on what is causing the tired appearance, but customer experiences show why it is worth assessing the current surface before replacing it. In a Google review, Michele Khandelwal described work on an entire main floor and four bathrooms: “Team grout came and did my entire main floor, as well as four of my bathrooms in my house. Kevin, Anissa and Diego were professional and polite and did an excellent job. Everything looks brand new again.” That is a report of a completed floor-and-bathroom project, not a promise that cleaning alone produces the same result on every floor.
For a shower example, Nick G wrote: “Team Grout did an amazing job restoring my shower. Hats off to Antonio for doing a amazing job restoring it. It looks like it was just installed today. The tiles shine, the grout was filled in and it was re-caulked. Thank you! Would definitely recommend.” The details matter: the reported result included grout filling and re-caulking, not just a quick wipe of the tile.
These projects illustrate what a defined restoration scope can achieve when the existing surfaces are suitable. They do not establish the condition of a different homeowner’s floor, rule out hidden moisture issues or set a universal price. That is what a property-specific assessment is for.
How long will the work take, and when can you use the area?
There are two separate clocks: time spent doing the work and time the products need before the surface returns to use. The appointment and the cure should both be discussed before work begins, particularly if it is your only shower or a main walkway.
- Assessment and scheduling: A free video quote or on-site assessment may be appropriate, depending on the surface, location and appointment availability. Your enquiry starts the review; an appointment is arranged and confirmed during follow-up. The assessment identifies the likely scope before a quote sets out the proposed work and price.
- Shower deep cleaning: Most residential showers are described as taking about half a day when the grout is sound. If a sealer is applied, ask the technician when the shower may get wet again.
- Shower restoration: Most residential showers are described as one-day projects when suitable, followed by curing for the selected sealer and caulking. The technician provides the exact reuse time for that job.
- Caulking replacement: The work is generally described as taking a few hours. The shower is typically reusable the next day, subject to the sealant’s cure instructions.
- Grout restoration on a floor: A suitable restoration is usually described as a one-day job, with return to use governed by the treatment applied. For a standard tile-and-grout cleaning followed by clear sealer, guidance calls for about four hours without foot traffic.
- Stand-alone clear sealing: Preparation can take longer than application. Cleaned tile and grout should dry for at least 12 hours before sealing, or potentially about four hours with air movers. After application, another 12 hours of drying is recommended, with at least six hours without foot traffic where applicable. Your technician’s instructions for the chosen product take priority over a general planning estimate.
Do not plan to walk on a treated entry floor or run a shower merely because it feels dry to the touch. Tell us if access is critical so the proposed sequence and curing requirements can be understood before you approve the work.
What should you prepare, and what will it cost?
You do not need to decide whether you are buying cleaning, sealing or regrouting before making an enquiry. Have the location of the problem ready, such as an entry floor, kitchen floor or shower; its approximate size; and a brief description of what you see. Tell us about cracks, missing grout, peeling caulk, recurring dampness and any previous sealer or colour treatment you know about. Photos of the whole area and a close-up of the affected joints help us prepare, but they do not always replace a video or on-site look.
For a work appointment, clear footwear, mats, bottles and other loose items from the immediate area. Make the floor or shower accessible and mention any surfaces that need special care. We assess the condition and material, protect surrounding areas as appropriate, carry out the agreed preparation and treatment, and explain aftercare and curing for the completed scope. Afterward, your part is the manageable routine: catch slush, remove grit before mopping, use a compatible cleaner and keep an eye on grout and caulking.
There is no useful flat price for keeping grout white. A small, intact shower needing a deep clean is a different job from a larger tiled floor with missing grout, and replacing one run of failed caulking is different from restoring a whole shower. Area, access, material, buildup, repair needs and finish affect the proposed work and its cost. A quote should say which surfaces are included, whether damaged grout or failed caulk is being addressed, what protection is proposed, and what curing and aftercare follow. Two quotes can use the same service name while describing very different work underneath.
A written-quote request with photos is a request for review and follow-up, not an instant exact price from limited information. The assessment answers, “What does my property need?” The quote then answers, “What work are you proposing, and what will it cost?” That distinction helps you spend on the right result instead of guessing from a photograph.
Best practices for the rest of the winter
- Make the entry setup convenient. Keep mats and the boot tray where people naturally stop, then empty or clean them when wet.
- Dry-clean before wet-cleaning. Remove loose grit from tiled traffic routes before mopping so it is not carried through the grout lines.
- Match the cleaner to the surface. Follow its label and use stone-safe, acid-free care for acid-sensitive natural stone. Do not combine household cleaning chemicals.
- Rinse as directed and change dirty water. Cleaner and soil left behind can make a recently mopped floor look dull again.
- Help the shower dry. Clear standing water from ledges and corners where practical and use available ventilation.
- Inspect, do not just polish over problems. Check for missing grout, recurring cracks, separated caulking or moisture beyond the tiled area. Address the cause before choosing a finish.
- Choose protection for its actual purpose. A compatible sealer may help with staining and maintenance. It is not a substitute for sound installation, intact joints or investigation of a hidden leak.
Frequently asked questions
Can I keep white grout clean with regular mopping alone?
Regular mopping helps remove fresh winter residue if you sweep or vacuum grit first, use a compatible cleaner, and rinse as directed. It may not lift embedded soil from textured grout. If a sound line remains dark after careful cleaning, professional deep cleaning is worth assessing. If the line is damaged, cleaning alone will not restore it.
Will clear sealer make white grout stay white all winter?
Clear penetrating sealer can help suitable absorbent surfaces resist staining, but it does not stop dirt from arriving on boots or make grout stain-proof. Keep using mats, remove puddles promptly and clean with products compatible with the treated surface. Clear sealer also will not hide an already uneven grout colour.
What if my grout is clean but looks patchy?
Check whether the patchiness follows cracked or missing sections, or whether intact lines simply vary in colour. Damage may need grout repair; compatible intact grout may be a candidate for colour sealing if a more consistent white is the goal. Existing treatments and the condition of the joints affect the choice.
Should I regrout the whole floor?
Not automatically. If tile is sound and damage is limited to certain grout lines, an assessment may identify a narrower repair and restoration scope. Repeated cracking or movement calls for a closer look at the floor before treating its appearance alone.
Can I put new caulk over the old bead to brighten a shower?
Do not use a new bead to cover failed caulking. A sound replacement starts with complete removal of the old silicone, followed by cleaning and drying the joint before new material is applied. If the caulk is sound and the problem is surface buildup on the tile and grout, cleaning may be the more relevant first step.
Is vinegar a good way to remove winter residue?
Do not treat vinegar as a universal tile cleaner. It is unsuitable for acid-sensitive stone such as marble, limestone and travertine. Identify the material and use a compatible cleaner instead. The same caution applies to lemon and acidic bathroom descalers.
When can I use my shower or walk across a sealed floor?
It depends on the service and product. A standard tile-and-grout cleaning page calls for about four hours without foot traffic after its clear sealer; stand-alone clear sealing can involve longer preparation and post-application drying. Recaulked showers are typically reusable the next day, while restored showers have job-specific sealer and caulk curing instructions. Confirm the exact time with the technician before use.
What if mould or a musty smell comes back after cleaning?
Do not assume another surface treatment will solve a recurring moisture problem. Cleaning and restoration address accessible surfaces, while persistent odours, recurring mould or visible moisture outside the shower can require further investigation. A grout colour finish or clear sealer does not repair hidden waterproofing or a leak.
A clear next step for your grout
For day-to-day care, keep winter grit and water off the floor, mop with a material-appropriate cleaner, and help shower surfaces dry. For grout that still looks grey, separate soil from damage before spending on a finish. The aim is not just a whiter line today, but a refreshed surface you can maintain with a realistic routine.
If you want an answer for your own tile, request a free video quote or on-site assessment with Team Grout, depending on suitability, location and availability. Call +1 289-277-0228 with the area, approximate size, visible concerns and any useful photos. We will follow up to determine the appropriate review and confirm an appointment when arranged; photos can support that conversation but may not replace it. Have the affected area accessible for the review. You will receive an assessment of what the surfaces need and a quote setting out the proposed scope and cost, so you can decide whether cleaning, repair, caulking replacement or protection is worth doing before another Toronto winter day arrives.