Mould keeps returning to a shower when cleaning removes the visible marks but leaves the conditions that caused them. The usual culprits are surfaces that stay damp, soap buildup, deteriorated grout, failed caulking or a moisture problem that needs investigation. Team Grout’s approach is to identify which of those is happening before recommending another clean, a repair or a finish.
A recurring dark patch does not automatically mean you need new tile. If the grout is sound, thorough cleaning and better drying may be enough to improve the shower. If caulking is separating or grout is missing, cleaning cannot put those materials back. If there is a persistent odour, loose tile or staining outside the shower, surface work may not address the source of moisture.
The useful question is not simply, ‘How do I remove the spot?’ It is, ‘Why does this particular spot keep getting wet, and is the material beneath it still sound?’ Answer that first, and you can choose work that improves the appearance without mistaking a cosmetic change for a moisture repair.
What recurring shower mould means
Recurring shower mould is visible growth that reappears after the affected area has been cleaned. Mould needs moisture and material it can grow on. Shower use supplies water and humidity; soap residue and other deposits can collect on surfaces, particularly in corners and joints. If those areas stay damp, a clean-looking shower can develop new spots.
Not every dark grout line is mould. It might be embedded dirt, mineral deposits, staining or a crack that looks darker because the grout surface is uneven. Nor does a dark mark tell you whether moisture is limited to the accessible surface. Where the mark appears, how quickly it returns and what the surrounding materials look like are more useful clues than colour alone.
Health Canada’s guidance on moisture and mould puts moisture control at the centre of prevention. Cleaning matters, but so do drying, ventilation and prompt attention to leaks or damaged materials. For a shower, that means looking at both the daily conditions and the tile, floor and caulking that receive the water.
Why the same spots keep turning dark
The shower is not drying between uses
Water left on walls, glass, ledges and the shower floor takes time to evaporate. In a bathroom with poor airflow, humidity can linger as well. Corners and the bottom edge of the enclosure often stay wet longer than the open centre of a tile wall.
Use the bathroom exhaust fan during showering and afterwards, and make sure it vents outdoors. Wiping or squeegeeing wet surfaces reduces the water left behind. Give the shower curtain or door room to dry, and move damp towels and mats out of the way. These habits can help, but they will not fix a gap in a joint or a leak behind a wall.
Soap scum and mineral deposits remain in detailed areas
A quick wipe can leave residue where a wall meets the floor, around a niche or along a door track. Soap scum and other deposits make those areas harder to clean and slower to dry. White or chalky mineral buildup may sit beside a dark patch, making it difficult to tell at a glance what needs treatment.
Cleaning needs to reach the affected details, using products suitable for the material. What is appropriate for ceramic tile may be wrong for natural stone. Marble and limestone, for example, can be damaged by acidic cleaners. If you are unsure what the surface is, avoid experimenting with stronger products.
The caulking has deteriorated
Look closely at vertical corners, the wall-to-tub or wall-to-base joint, and the edges of niches and ledges. Caulking that is peeling, cracking, separating or showing persistent dark marks within the material may need replacement. Mould embedded inside old silicone generally cannot be solved by bleaching its surface.
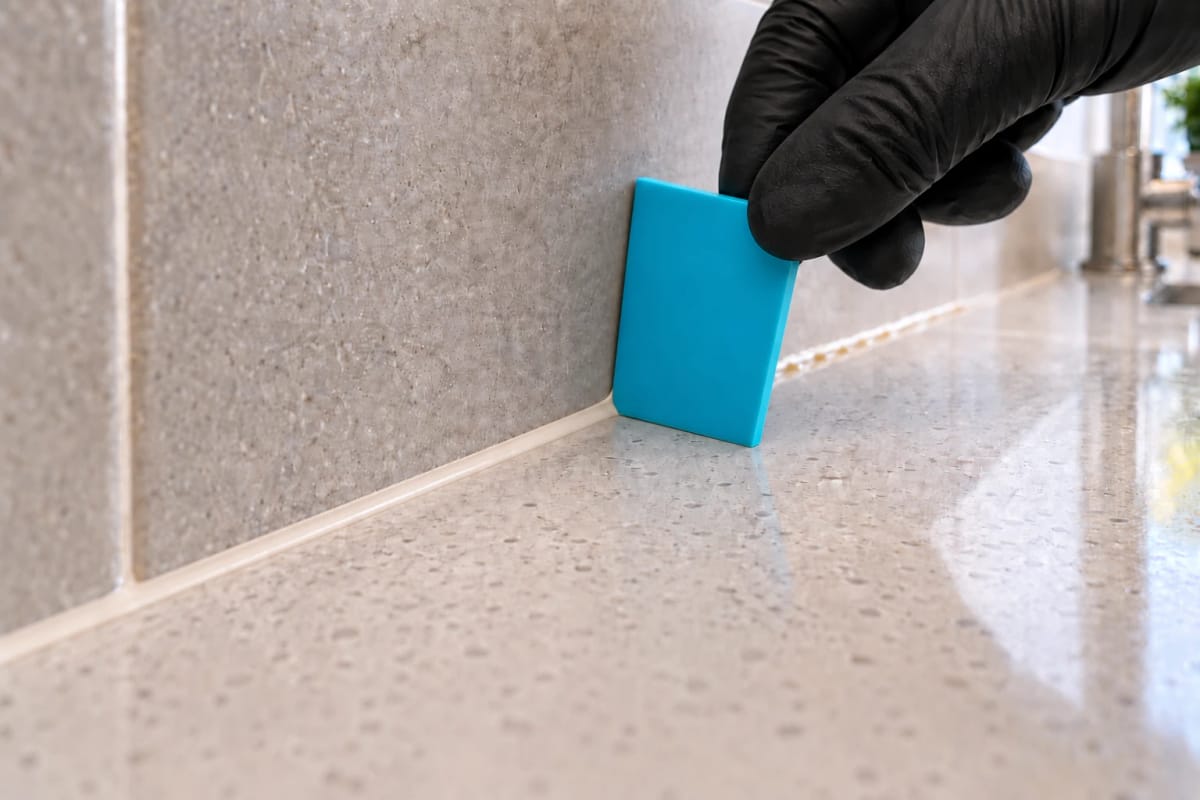
A fresh bead is not a fresh start if the failed caulk stays underneath. Covering old caulking can trap moisture and leaves the failed material in place. Proper replacement starts with complete removal, followed by joint cleaning and drying before the new bead is installed. Getting that preparation right matters as much as how neatly the finished line looks.
The grout needs repair, not another scrub
Intact grout with buildup can often be cleaned. Cracked, pitted or missing grout is a different problem: a cleaner cannot fill a hole. Damaged sections can also look dirty even when the surrounding lines are clean because their uneven surfaces catch light differently.
Pay particular attention to the shower floor and the junctions where water collects. A sound tile floor can still have grout lines that need individual repair. Repeated cracking, loose tile or movement is a reason to investigate before treating the problem as a simple surface refresh. The tile may be fine. The grout is stealing the spotlight.
Water may be coming from somewhere you cannot see
Sometimes the shower dries reasonably well, yet a mark keeps returning in one place. A persistent musty smell, staining on an adjoining wall or ceiling, bubbling paint, soft material, loose tiles or recurring cracks deserve closer attention. A plumbing issue or failed underlying shower assembly may be involved.
Cleaning and restoring accessible surfaces cannot establish what is happening behind tile. Clear sealer is not waterproofing, and new caulking cannot repair hidden damage. When the signs point beyond the visible joints, investigate the moisture source before spending money on a finish. A brighter shower is worthwhile; covering an unresolved problem is not.
How to decide what your shower actually needs
At Team Grout, we separate the decision into three questions: Is it staying wet? Is the surface material sound? Is there evidence of a problem beyond the surface? You can use the same sequence without diagnosing the shower yourself.
- Notice where the problem returns. Marks spread across frequently wet tile and grout suggest a different starting point from a dark line confined to separating silicone. Photograph the area before cleaning so its location is clear.
- Check how the room dries. Is water still sitting on the floor, ledge or glass well after use? Does the fan work, and does damp air have a way out? Improving drying is sensible regardless of which surface service you choose.
- Examine the joints. Look for caulk pulling away from the tub or shower base. Check grout for holes, crumbling sections or repeated cracks. Do not try to hide these clues under a new bead or a coating.
- Look beyond the enclosure. Note odours, stains, soft surfaces or changes on the other side of the wall or below the bathroom. Those observations help determine whether surface work should wait for further investigation.
- Choose a scope that matches the condition. Cleaning removes buildup from sound material. Repair replaces what is missing or failed. Sealing, when suitable, helps protect a prepared surface. None of those steps should be treated as interchangeable.
You do not need to learn every technical term. You need to know what the proposed work will do, what it will leave untouched and when you can use the shower again.
Cleaning, caulking replacement or restoration?
We match the service to the condition rather than treating every returning spot as a whole-shower job. These are the main distinctions:
- Team Grout shower deep cleaning: For tile and grout that are dirty but sound. Work can address buildup on the tile, grout, shower floor, corners and glass, followed by clear sealer where suitable. It does not repair cracked grout or failed caulking.
- Targeted caulking replacement: For deteriorated joints when the surrounding tile and grout do not require a broader restoration. The old silicone is removed completely, the exposed joint is cleaned and dried, and new waterproof, mildew-resistant caulking is applied.
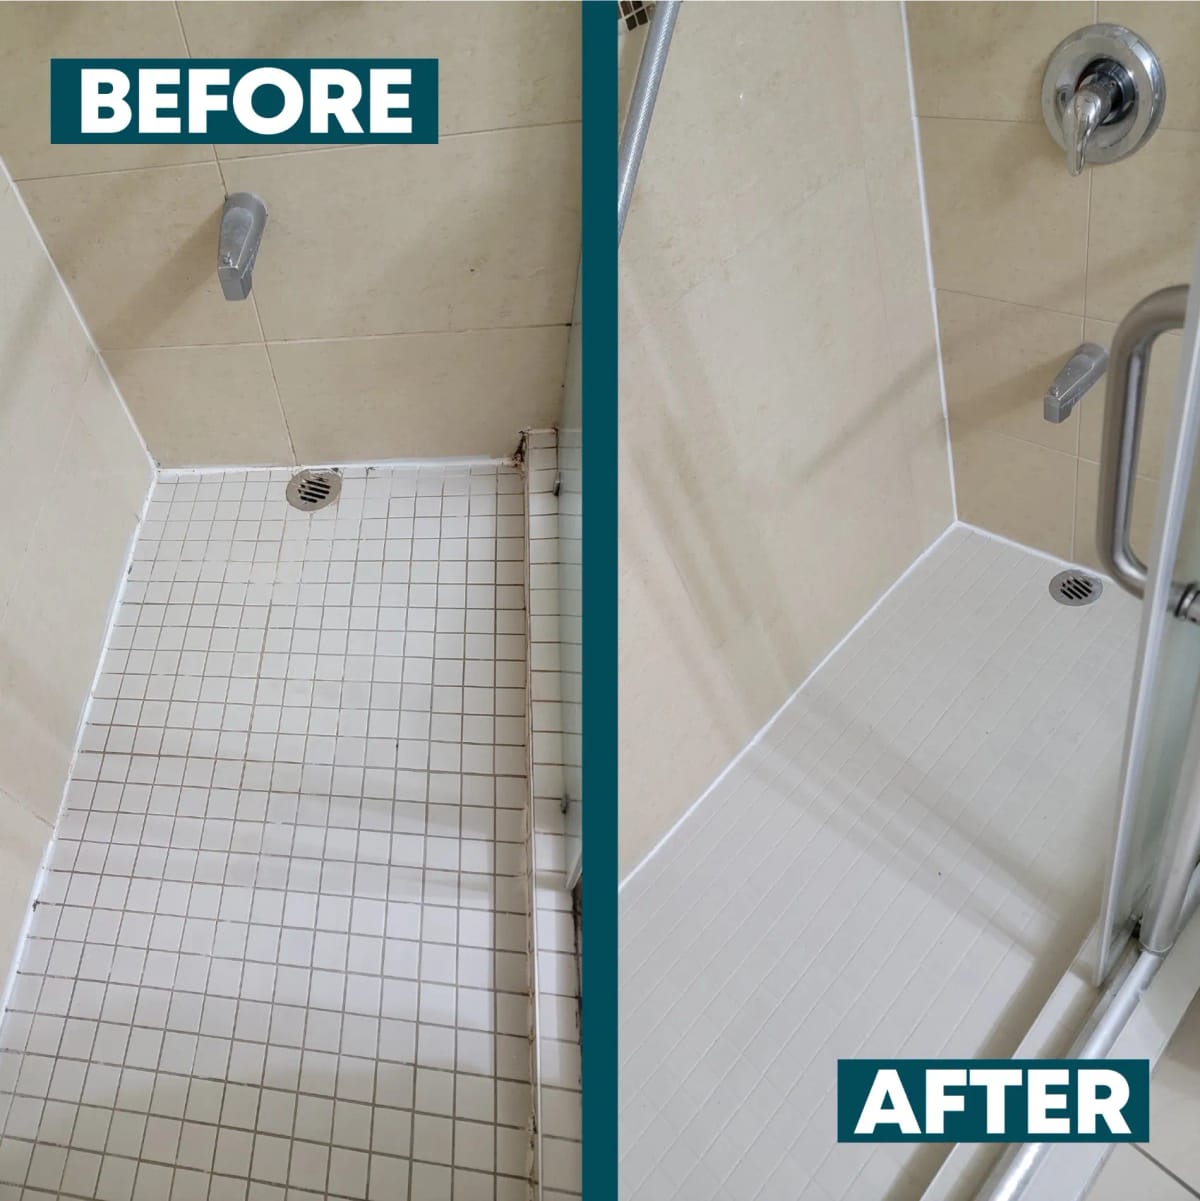
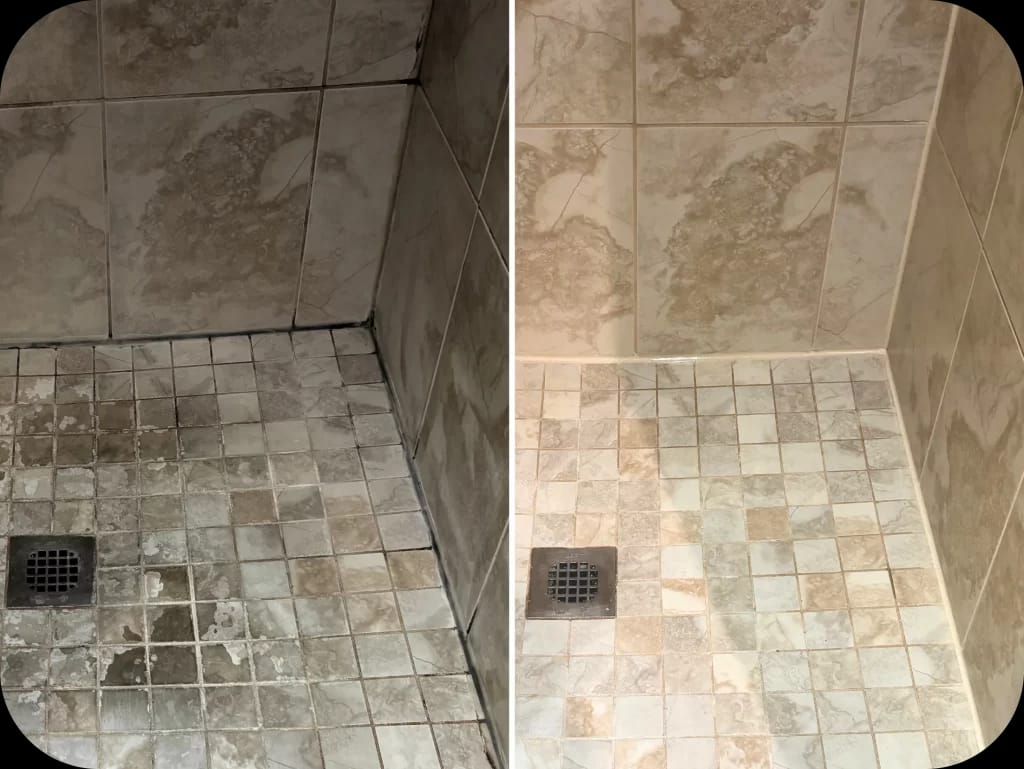
- Grout repair and shower restoration: For showers with a combination of buildup, missing or cracked grout, uneven grout appearance and failed caulking. Depending on the assessment, work may include deep cleaning, treatment of affected accessible surfaces, individual grout repairs, grout colour sealing and caulking replacement while sound tile stays in place.
- Further moisture investigation: The appropriate next move when odours, recurring cracks, loose tile or staining suggest that surface work alone may not solve the problem.
Within a restoration, the choice of finish matters too. Clear penetrating sealer helps suitable absorbent surfaces resist staining while retaining their appearance; it does not hide discoloured grout or make the shower waterproof. Grout colour sealing can give compatible grout a more consistent colour and stain protection after proper preparation. Neither is a substitute for removing failed caulk or repairing missing grout.
Want to examine the grout itself more closely? Our post on black mould on shower grout explores that particular concern. If both cracks and caulking are involved, read about repairing cracked shower grout and replacing mouldy caulking.
What proper shower preparation involves
A shower can look cleaner without being properly restored. The difference is usually in the work before the finish. After assessing the materials and protecting the surrounding area, a technician cleans the appropriate tile, grout and wet-zone details. Affected accessible surfaces can receive dedicated mould-removal treatment as part of preparation, followed by the required cleaning and rinsing stages.
If grout is damaged, the agreed repairs come before a finishing treatment. If caulking has failed, it is removed rather than coated over. Exposed joints must be cleaned and dried before new caulking is installed. Any colour sealer or compatible clear sealer is chosen for the material and intended result, with product-specific drying and curing instructions.
The finish is what you see. The preparation is what you are paying for. That is also why two quotes carrying the same service name can propose very different work. One might cover cleaning alone; another might include grout repair and complete caulk replacement. Ask which surfaces and joints are included, what will be removed, what will be repaired, what finish will be applied and what concerns remain outside the scope.
What real shower projects show, and what they do not
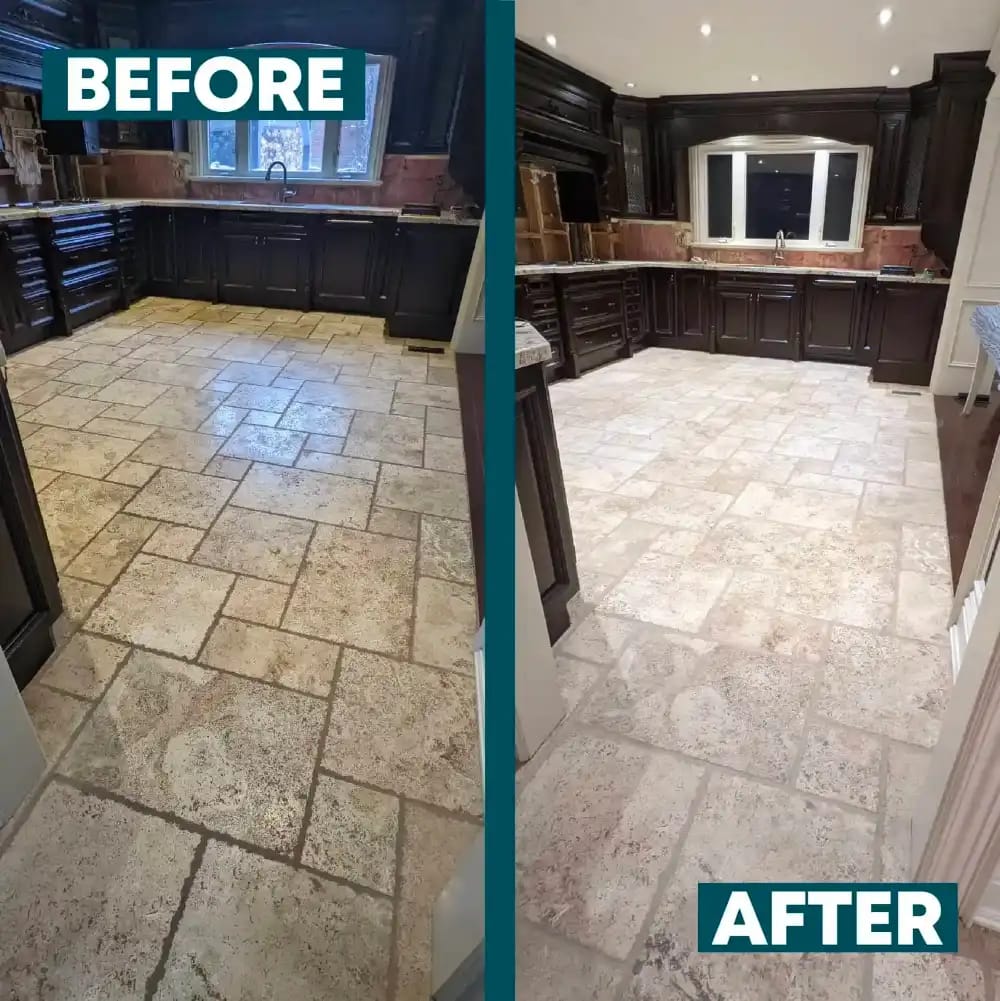
Homeowner reviews offer a useful picture of what combined work can achieve. In a Google review, Nick G described a shower restoration in which the tiles shone, the grout was filled in and the shower was recaulked. Francis Hsue described cleaning, sealing and recaulking work in a main shower. Cynthia C reported a bathroom deep clean and recaulking job, praising the care taken with the work.
Those are examples of visible surface improvements after specific scopes of work, not promises that every dark mark has the same cause or that a hidden moisture issue disappears with restoration. They do show why it pays to identify the work beneath the word ‘cleaning’. If an existing shower has sound tile, the right combination of cleaning, repairs and finishing may refresh its appearance without replacing that tile.
How long it takes, from assessment to using the shower again
There are two separate clocks: the time needed to assess and schedule the job, and the time needed to do the work and let materials cure. The scope determines both. A free video quote or on-site assessment can be arranged depending on the concern, location and availability; an enquiry is not a confirmed appointment until the details have been arranged with you.
- Shower deep cleaning: Most residential showers are described as taking about half a day. If a sealer is used, get the technician’s wet-use instructions before showering again.
- Caulking replacement: The work generally takes a few hours. The shower is typically reusable the next day, subject to the particular sealant’s cure instructions.
- Full shower restoration: Most residential showers are described as one-day jobs when the planned work is suitable for surface restoration. Sealer and caulk still need to cure afterwards; the technician will give the actual return-to-use time.
Dry to the touch is not the same as ready for shower water. Scheduling also depends on the agreed scope and appointment availability, so ask for both the workday plan and the reuse instructions when reviewing your quote. If the assessment points to a concern behind the finish, resolve that question before relying on a surface-work timetable.
What it costs and how to compare quotes
There is no useful single price for ‘mould in a shower’ because that phrase describes an appearance, not a scope of work. Shower size and buildup affect cleaning. The length and condition of the joints affect caulking work. Grout damage, repairs, sealing and finishing choices affect restoration. An accessible shower needing a clean is not the same job as one with missing grout and failed caulk.
The assessment answers, ‘What does my property need?’ The resulting quote answers, ‘What work are you proposing, and what will it cost?’ A written-quote request made with a brief description or photos is a request for review and follow-up, not an instant exact price from limited information. Photos help us prepare, but a video or on-site look may still be needed to settle the scope.
When comparing proposals, ask whether the price includes removal of old caulk, preparation and drying of exposed joints, grout repairs, the type of sealer, curing guidance and any limitations. Two quotes. Same service name. Very different work underneath. Our post on what to expect from a written tile-cleaning quote can help you compare what is actually being offered.
Best practices to help keep a restored shower looking better
No mould-resistant caulking or sealer can promise that visible mould will never return. Aftercare still matters, especially in a shower used every day.
- Reduce standing water. Squeegee or wipe walls, glass and ledges after use, and pay attention to places where water sits on the shower floor.
- Use ventilation consistently. Run the bathroom fan during and after showering. If the room remains damp, check that the fan is working and exhausting outdoors.
- Clean buildup before it becomes stubborn. Use a cleaner compatible with your tile, grout and any sealer. Avoid abrasive scrubbing that could wear a vulnerable joint.
- Watch repaired areas. If a new crack appears, caulk separates or the same patch quickly returns despite better drying, do not keep covering it. The pattern is useful information for the next assessment.
- Respect curing instructions. Keep water off newly treated surfaces for the period specified for the products actually used on your job.
New shower. Same moisture. Protecting the result still matters. If your tile, grout or stone has recently been installed or restored, ask whether compatible stain protection is appropriate. Not every material needs sealing, and protection does not replace sound tile installation, properly prepared floor joints or correctly installed caulking.
Frequently asked questions about returning shower mould
Why does mould come back so soon after I clean it?
The area may still be staying wet, or buildup may remain in a corner or joint. Dark material inside old silicone, damaged grout or an ongoing moisture source can also make cleaning alone ineffective. Note exactly where it returns and check the condition of the surrounding surfaces before repeating the same treatment.
Can I clean a small patch myself?
For a small area on a washable, sound surface, careful cleaning with a suitable mild product and thorough drying can be a reasonable first step. Follow the product directions, use appropriate protection and never mix cleaning chemicals. If the mark is within deteriorated silicone, or it keeps returning, the material or moisture conditions may need more than a clean.
Will bleach stop shower mould from returning?
Lightening a visible mark does not repair separated caulk, fill a grout crack or improve ventilation. Do not rely on repeated chemical treatment to solve a recurring moisture problem, and never combine cleaning products. If the surface is natural stone, check compatibility before using any bathroom cleaner.
Should I replace the caulking or the grout?
Replace failed caulking at joints that are peeling, cracked or separating. Repair grout where it has holes, missing sections or cracks, if the underlying surface is suitable for repair. The shower may need one service, both or further investigation. Their roles are different, so replacing one does not automatically address a problem with the other.
Will sealing the grout waterproof my shower?
No. A compatible clear penetrating sealer can help suitable porous surfaces resist staining. Grout colour sealing can refresh compatible grout and provide stain protection. Neither repairs hidden leaks, replaces failed underlying waterproofing or makes every part of a shower assembly waterproof.
What if mould returns after professional restoration?
Check whether the shower is drying as expected and whether any joint has changed. Record where and when the mark returns. Persistent odours, recurring cracks, loose tile or staining outside the shower call for further investigation rather than another cosmetic finish. Surface treatment addresses accessible areas, not concealed conditions.
Do I need to replace all the tile?
Not necessarily. Sound tile can often stay in place while the grout is cleaned or repaired and failed caulking is replaced. Loose tile, recurring movement or signs of moisture beyond the surface change that decision. Before you buy new tile, get an answer about the tile you already own.
Get an answer about your shower before choosing the work
If the same spots keep returning, your next step is a free video quote or on-site assessment, depending on what can be assessed remotely, your location and appointment availability. Tell us where the marks appear, how quickly they return, and whether you have noticed gaps, cracks, loose tile or an odour. Have your location, contact details and a preferred time to discuss the shower ready. A wide photo and close-ups of the grout and caulking are helpful supporting details, but they may not replace a video or on-site review.
After you send your enquiry, our team follows up to arrange the suitable assessment option and confirm the appointment details. Keep the shower accessible for the review; if work is booked, clear personal items before the technician arrives. We assess the visible tile, floor, grout and caulking, explain the recommended scope and its limits, then provide a quote for the proposed work and guidance on timing and aftercare. You should not have to choose between cleaning, recaulking and restoration by guesswork.
A refreshed shower starts with understanding why the marks return. Team Grout helps Toronto and GTA homeowners make that decision before committing to the wrong fix. To arrange your assessment, call +1 289-277-0228 or email info@teamgrout.ca.