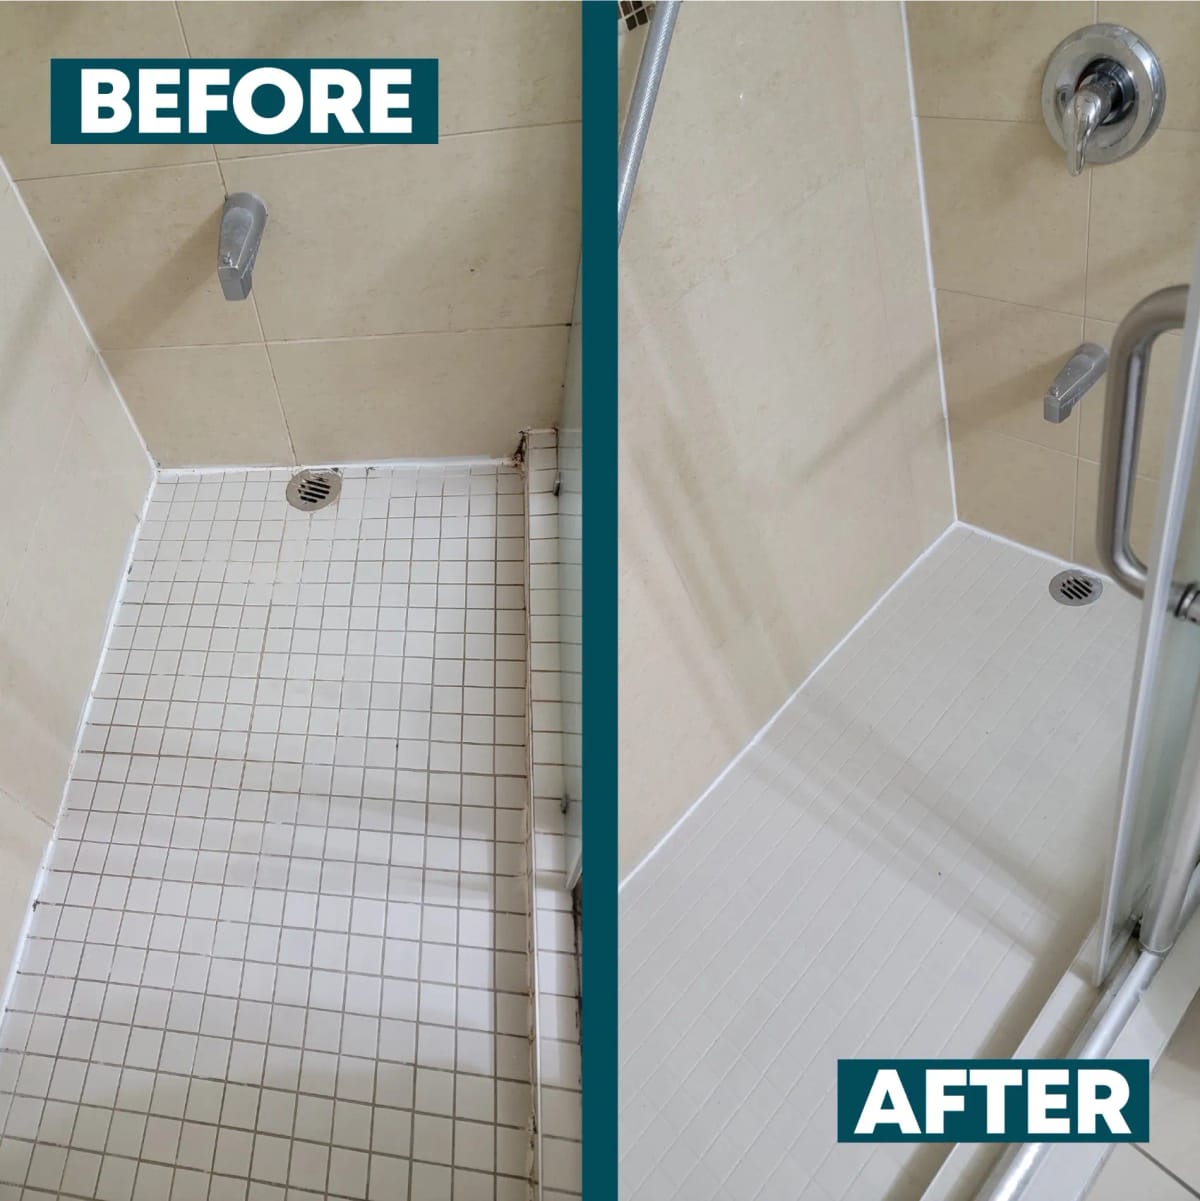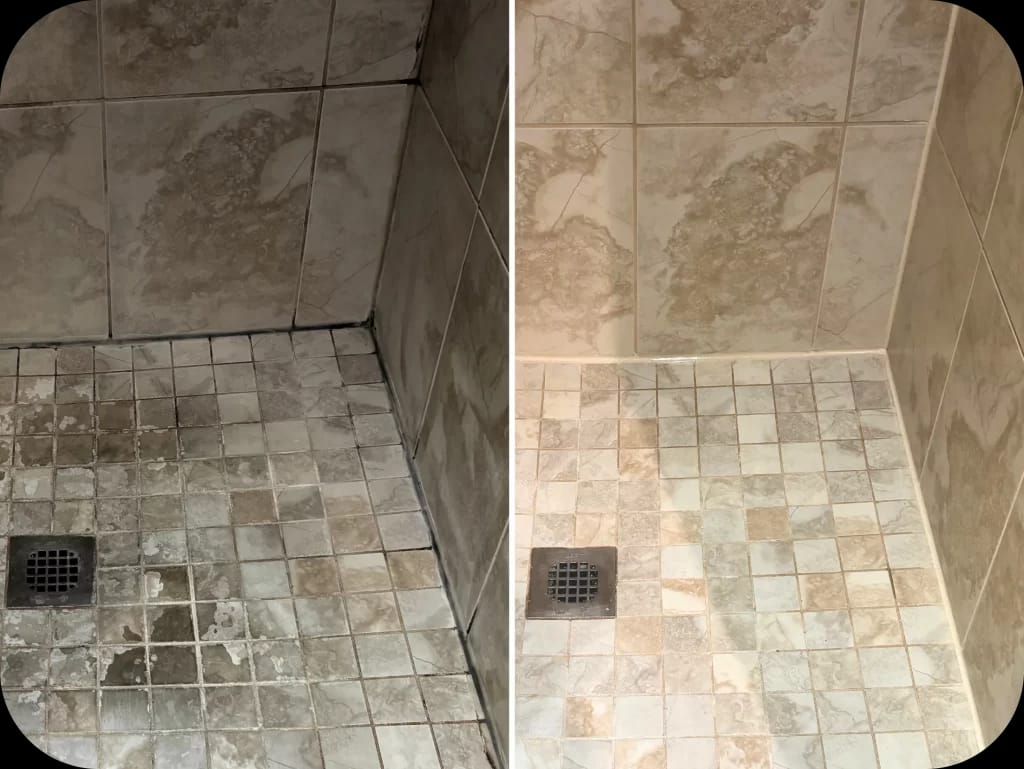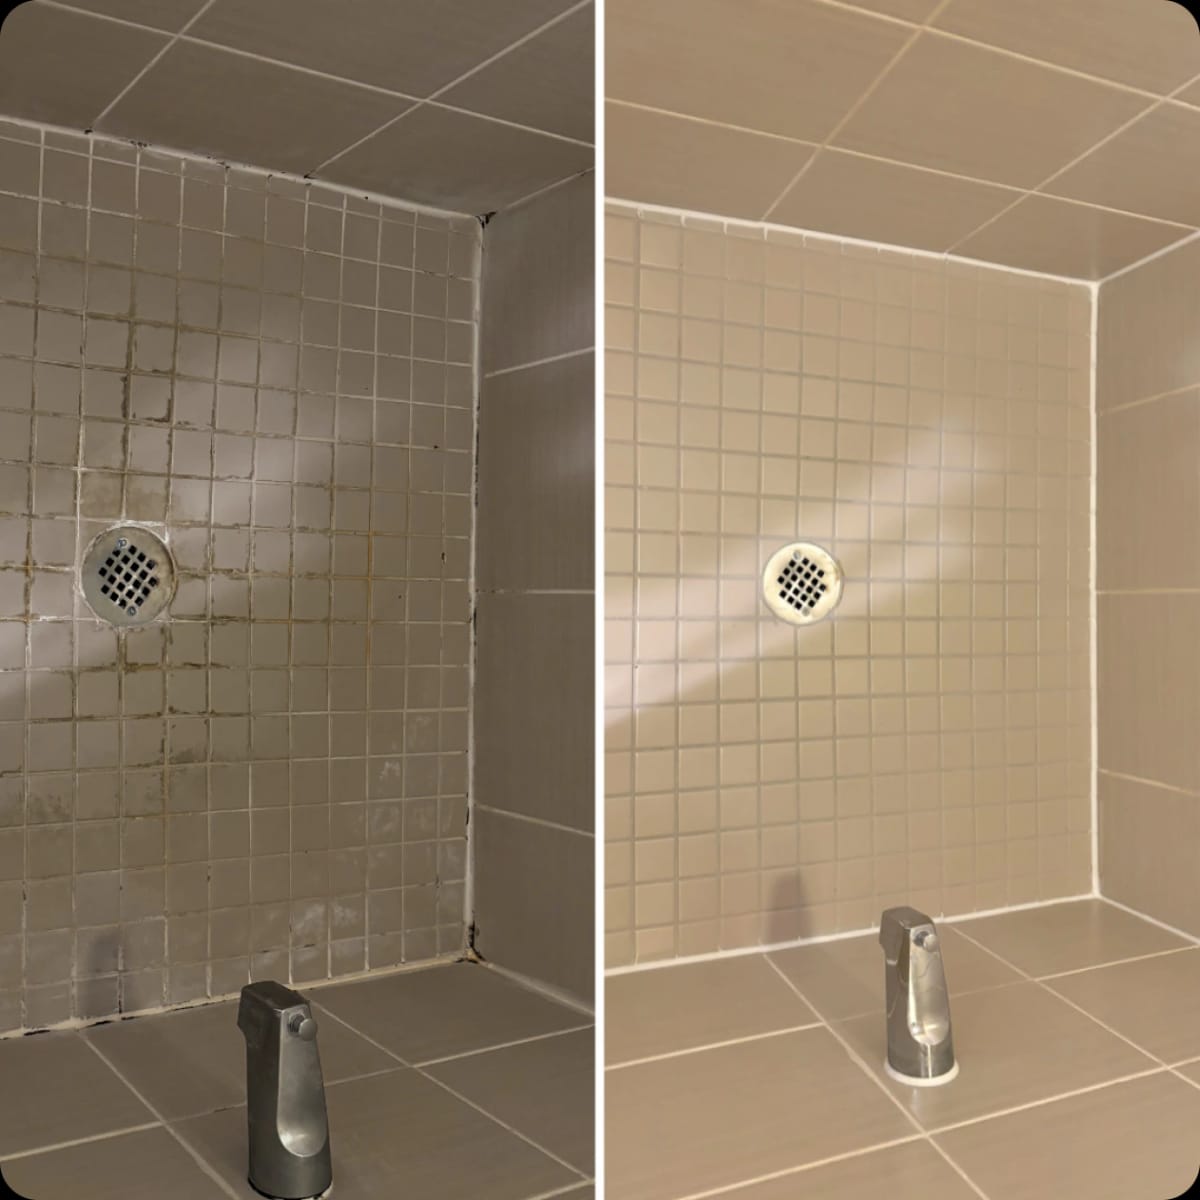
To remove black mould from sound shower grout, clean a small affected area with unscented detergent and water, gently brush the grout, rinse away the residue, and dry the shower thoroughly. If the dark marks keep returning, the grout is cracked, or the caulking is peeling or blackened through, cleaning alone is unlikely to solve the problem. Check the condition of the joints and the source of moisture before applying a sealer or another cleaning product.
Black does not identify a particular mould species, and a lighter-looking grout line does not prove that moisture behind the tile is gone. The practical question is whether you are dealing with growth on an intact surface, damaged grout, failed caulk, or a broader water problem. Each calls for different work.
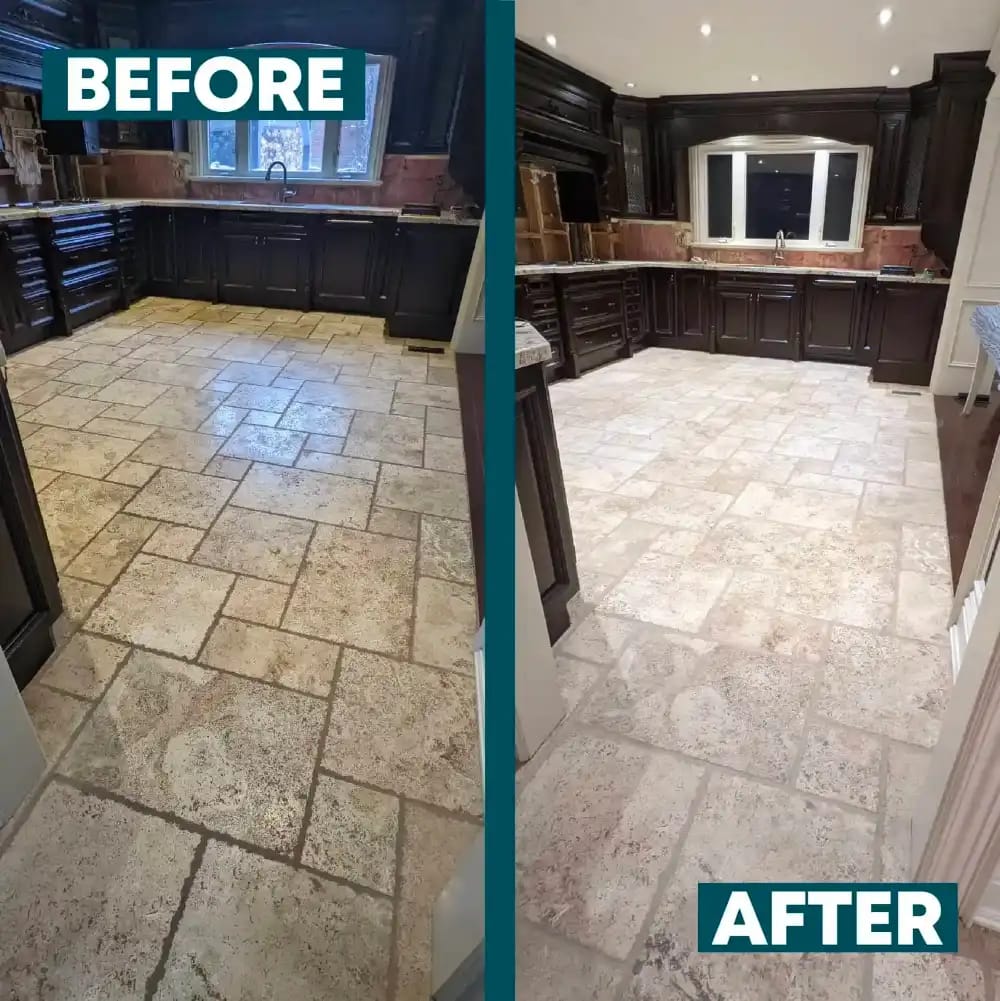
At Team Grout, we separate cleaning from restoration for exactly that reason. Sound tile can often stay in place while affected accessible surfaces are cleaned, damaged grout is repaired, and failed caulking is replaced where appropriate. The aim is a refreshed shower you can maintain, with a clear understanding of what the surface work can and cannot fix.
What does black mould on shower grout mean?
People often call any dark spotting in a shower black mould. Some marks are visible mould or mildew on a damp surface; others may be ingrained staining or soil. Appearance alone cannot tell you how far a moisture problem extends. Inspect the grout itself, the flexible caulking at corners and edges, and the surrounding tile rather than treating every dark line as the same problem.
Shower grout is exposed to water, soap residue and repeated wetting. Corners, ledges and the shower floor can remain damp longer than the broad tile faces. A crack or missing section of grout creates an area that cleaning cannot put back together. Caulking that has separated from a tub, base or wall joint is a different material altogether, and black staining embedded inside old silicone generally calls for replacement rather than more brushing.
Health Canada’s guidance on moisture and mould indoors emphasizes both cleaning affected areas and controlling the moisture that allows mould to return. In a shower, that means looking at ventilation and drying habits, but also taking loose tile, recurring cracks, persistent odours and possible leaks seriously.
When is it reasonable to clean shower grout yourself?
A careful DIY clean is a sensible first step for a small, accessible patch when the tile is secure, the grout is intact, and there are no signs of water damage beyond the surface. It is not a good substitute for investigating a soft wall, water escaping the shower, a persistent musty smell, or widespread or recurring growth. If someone in the home has a health concern related to mould exposure, seek appropriate medical advice rather than relying on a cleaning tutorial.
Before you start, look closely at the affected area in good light:
- Check the grout line. Is it firm and continuous, or are there cracks, pits and missing pieces?
- Check the caulking. Is it bonded to both sides of the joint, or is it peeling, split or lifting?
- Check the tile and shower floor. Are tiles secure, and does water drain away rather than sitting in a recurring problem area?
- Check nearby surfaces. Staining outside the shower, softness or a continuing odour changes the problem from routine cleaning to investigation.
You do not need to diagnose the shower assembly to notice these warning signs. If the materials are failing, stop treating the dark colour as the whole issue.
What you need for a small surface clean
- Unscented household detergent and water.
- A soft or moderately firm nylon brush suitable for the grout and surrounding tile.
- Gloves and eye protection, plus a properly fitted respirator when cleaning visible mould.
- Clean cloths for rinsing and drying.
- A working bathroom exhaust fan, where available.
Choose tools and products that suit the material. Glazed ceramic tile, natural stone, existing sealers and coloured grout do not all respond the same way to cleaners. For acid-sensitive stone, avoid vinegar, lemon and acidic bathroom descalers. Do not mix cleaning chemicals, and do not add bleach to a detergent solution. Health Canada recommends soap or detergent and water for cleaning small areas of household mould and advises against using bleach for mould cleanup.
How to remove surface mould from intact shower grout
1. Prepare the area without spreading debris
Remove bottles, mats and other items from the shower so you can reach the grout and let surfaces dry afterward. Run the exhaust fan if you have one. Put on gloves, eye protection and a suitable respirator. Dampen the area as you clean rather than dry-brushing visible growth into the air.
2. Wash a manageable section with detergent and water
Apply the mild cleaning solution to the affected grout and neighbouring tile. Work in small sections so you can see what is lifting and avoid letting dirty water sit in corners or on the shower floor. Follow the detergent’s label rather than improvising a stronger mixture.
3. Brush gently along the grout line
Use controlled strokes with the nylon brush. The point is to remove surface residue, not grind down the grout. If pieces come loose, the line opens up, or the tile moves, stop scrubbing. That section needs assessment for repair, not more force.
4. Rinse and remove the dirty water
Rinse the cleaned area with fresh water and wipe away loosened material. Pay attention to ledges, the floor and the lower corners, where residue and water can collect. A clean-looking wall above a damp, dirty floor is only half a clean shower.
5. Dry thoroughly, then inspect
Wipe down the tile, grout and ledges, and keep the bathroom ventilated while the surfaces dry. Look again once the grout is dry. A dark patch that does not lift may be staining or a sign that the material needs further attention. Do not seal over visible growth, damp grout or a failing joint simply because the surface looks better while wet.
For a small area of surface growth, these steps may be enough to restore the appearance. If dark marks return in the same place, or if cleaning exposes cracks or gaps, move from cleaning to figuring out why that spot stays vulnerable.
Why does mould return after the grout looks clean?
Removing visible growth does not remove the conditions that supported it. Shower walls and floors are repeatedly wet, and soap film can collect where rinsing is difficult. The exhaust fan may not clear moisture effectively, or water may sit on a ledge or along a floor joint. A failed bead of caulk can also leave a gap at an area that receives water every day.
Our practical approach is to check three things in order: the moisture pattern, the condition of the surface, and the condition of the joints. Moisture explains why the area is repeatedly wet. The surface tells you whether cleaning can work. The joints tell you whether grout repair or caulking replacement is needed before a finish is applied.
Pay particular attention to black marks concentrated along the wall-to-base joint, vertical corners and the edge of a tub. That flexible material is caulking, not grout. A fresh bead is not a fresh start if the failed caulk stays underneath. When silicone has separated or become stained within the material, cleaning its face or covering it with new caulk leaves the original problem in place.
Repeated cracking, a musty smell that persists after cleaning, loose tiles or dampness beyond the shower can point to a problem that surface restoration cannot correct. Have the underlying moisture issue investigated before relying on new grout, caulk or sealer to hold back water.
Cleaning, repair, sealing or caulking: which work fits?
The right option depends on what remains after careful cleaning and inspection. Two quotes can use the same service name while describing very different preparation and repairs. Ask what the proposed work actually includes.
Deep cleaning for sound grout
If grout is intact but covered in buildup or affected by surface spotting, professional shower deep cleaning targets tile, grout, corners, the shower floor and other included surfaces. Team Grout uses surface-appropriate products and equipment to remove buildup, then rinses and applies an agreed finish where suitable. A typical residential shower deep clean is described as taking about half a day. It does not fill cracks or replace deteriorated caulk.
Grout repair where material is missing
Cracked, pitted or missing grout needs more than a cleaner. Repair addresses the damaged lines before an appropriate finishing treatment. This can also explain why a line still looks dark after scrubbing: uneven or missing material can affect its appearance. Sound tile may remain in place when the shower is suitable for restoration, but the condition needs to be assessed first.
Caulking replacement for failed flexible joints
When the grout and tile are in good shape but the silicone is peeling, cracked or mould-stained within the bead, targeted caulking replacement may be enough. The work includes complete removal of the old silicone, cleaning and drying the exposed joint, and installing new waterproof, mildew-resistant caulking. Mould-resistant does not mean mould can never return. The shower still needs appropriate drying and maintenance.
Clear sealing or grout colour sealing
Clear penetrating sealing can help suitable absorbent grout resist staining while keeping its existing appearance. It will not conceal persistent discolouration. Grout colour sealing is a separate treatment that can give compatible grout a more consistent colour and stain-resistant finish after the necessary cleaning and repairs. Neither is a substitute for removing affected material where required, nor does clear sealer waterproof an entire shower assembly.
Combined shower restoration
When a shower has buildup, damaged grout and failed caulking at the same time, a combined restoration may be the appropriate scope. Preparation can include treating accessible affected surfaces, cleaning and rinsing, repairing suitable grout lines, applying the selected finish and replacing failed caulking. The finish is what you see. The preparation is what you are paying for.
A shower surface can look considerably better after this work without any claim that hidden mould has been removed or that a failed waterproofing layer has been repaired. If the assessment raises concerns about what is happening behind the tile, those concerns need to be addressed on their own terms.
What does a professional shower assessment achieve?
It helps answer a question the internet cannot settle from a photograph alone: what does your shower need? We look at the visible tile, grout and caulking, the pattern of staining or recurring growth, and signs that the problem may extend beyond accessible surfaces. The recommendation may be a focused clean, caulking replacement, grout repair, a combined restoration, or further investigation before cosmetic work.
That distinction matters when you are trying to avoid paying for the wrong scope. For example, a grout colour sealer may refresh a sound but uneven-looking line; it cannot rebuild missing grout. New caulk can seal a properly prepared joint; it should not be laid over a loose, mould-stained bead. And neither product corrects a leak behind the wall.
Results depend on the existing materials and what is causing the discolouration. In a Google review, Nick G described his shower after restoration: “The tiles shine, the grout was filled in and it was re-caulked.” That is a useful example of why a refreshed appearance may come from several kinds of work together, not cleaning alone. Another reviewer, Cynthia C, specifically praised the care taken with her bathroom’s recaulking and deep clean. Individual results are not a promise for every shower, but these projects show the value of matching the work to the condition.
How long does cleaning or restoration take?
Separate the appointment from the work and the curing period. First comes a review of the shower and a proposed scope. Scheduling the assessment and, if you accept a quote, the work depends on your location, the job and appointment availability. A request to be contacted is not itself a confirmed appointment; confirm the date and time when our team follows up.
- Shower deep cleaning: Most residential showers are described as taking about half a day, depending on size and buildup.
- Caulking replacement: The work generally takes a few hours. The shower is typically reusable the next day, subject to the chosen sealant’s curing instructions.
- Full shower restoration: Most residential showers are described as one-day projects, followed by the curing time required for the materials used.
- Return to use after sealing: Drying and curing vary by treatment. Do not assume that a foot-traffic cure time stated for a floor sealer is permission to get a newly treated shower wet.
We give job-specific reuse instructions after the work. That is more useful than a universal clock: the timing for fresh caulk and the timing for a sealer may differ, and a shower should stay out of use until the applicable materials are ready.
What will it cost, and what do you need to do?
There is no responsible flat price for every black grout line. A quote depends on the size and condition of the shower and on whether the scope is cleaning, grout repair, sealing, caulking replacement or a combination. Long or difficult-to-access caulk joints and evidence of underlying deterioration can change the work required. The assessment clarifies the likely treatment; the quote states the proposed work and its cost before you decide.
For the initial enquiry, have your contact details, location and a brief description ready. Tell us where the dark marks appear, whether they return after cleaning, and whether you can see missing grout, separated caulk or water beyond the shower. Photos of the full shower and close-ups of the grout, corners and shower floor are useful supporting information. They can help us prepare for the assessment, but they do not always replace a video or on-site review.
Team Grout offers free video quotes or on-site assessments depending on suitability, location and availability. After you send the enquiry, our team reviews it and follows up about the appropriate appointment; confirm the appointment details rather than assuming the request has booked a time. For a video review, have the shower accessible and enough light to show the affected lines and joints. For an on-site visit, clear personal items from the areas you want assessed. Keep the same concern summary and photos handy for the appointment so you do not have to start the explanation from scratch.
From the assessment, expect a recommendation about the visible surfaces and whether a narrower service may fit. The resulting quote should identify the work proposed, such as cleaning, joint preparation, grout repair, sealing or caulking replacement, and give you a price for that scope. A written-quote request is a request for review and follow-up, not a promise of an instant exact price from a few pictures.
If you proceed, we handle the agreed surface preparation and treatment. Your main jobs are providing access, allowing the specified cure before using the shower, and following the aftercare instructions. You should not have to choose between technical service names without knowing what each one will do.
Best practices to keep shower grout cleaner
- Remove water after use. Squeegee walls and glass, and wipe ledges or corners where water remains. This is particularly helpful where dark marks tend to reappear.
- Ventilate while showering and afterward. Use the bathroom exhaust fan to help clear moisture, and check that it is working rather than assuming it is.
- Keep the floor and perimeter in view. The floor may dry differently from the walls, and a small failing joint at its edge is easy to miss. Tile, floor grout and caulking each need to be in sound condition for the shower to remain straightforward to maintain.
- Clean with the material in mind. Use a suitable cleaner, especially on natural stone or previously sealed surfaces. Avoid aggressive brushing that removes sound grout.
- Repair damage before finishing over it. A sealer or colour treatment belongs on properly prepared, suitable material, not over a crack, loose caulk or visible growth.
- Watch the pattern, not just the colour. A one-off surface patch and a mark that returns to the same wet corner call for different decisions.
If you have just renovated, the same principles apply. New shower. Same moisture. Ask what the tile, grout, floor and caulking materials need for appropriate care; not every material calls for sealing, and a protective finish does not replace sound installation.
Frequently asked questions
Can black mould be removed from shower grout permanently?
You can clean a small amount of visible surface growth from sound grout, but no cleaning treatment permanently prevents mould in a shower that continues to stay damp. If it returns, check the moisture pattern, grout condition and caulking rather than simply repeating the same treatment.
Is black grout staining always mould?
No. Dark grout can also reflect soil, staining or damaged material. Colour alone cannot identify a mould species or tell you whether there is hidden damage. Inspect the line after it is cleaned and dry, and pay attention to recurring marks and material failure.
Should I use bleach on mouldy grout?
For small household mould cleanup, Health Canada recommends soap or detergent and water and advises against bleach for mould cleanup. Never mix bleach with detergent, vinegar or another cleaning chemical. If the affected surface is extensive or damaged, a stronger cleaner is not a substitute for assessment.
Why is the black line still there after scrubbing?
It may be persistent discolouration, damaged or missing grout, or staining within silicone rather than soil sitting on the surface. Let the area dry and inspect it closely. If the line is cracked or the bead is separating, repair or replacement may be more appropriate than another scrub.
Can I put new caulk over mouldy shower caulk?
No. Failed silicone should be removed completely so the exposed joint can be cleaned, dried and prepared before new caulking is installed. Covering an old bead can conceal deterioration and leave moisture trapped where you cannot see it.
Will grout sealer make my shower waterproof?
No. A suitable clear penetrating sealer can help grout resist staining; a colour sealer can refresh compatible grout lines and provide a stain-resistant finish. Neither repairs a hidden leak or replaces the shower’s underlying waterproofing.
Do I need to replace the tiles if mould keeps returning?
Not automatically. If the tile is structurally sound, the useful work may be cleaning, grout repair, caulking replacement or a combination while keeping the tile. Loose tiles, soft surrounding materials or signs of a hidden leak call for further investigation before deciding that surface restoration is enough.
How soon can I use the shower after recaulking or restoration?
Caulking replacement typically takes a few hours and the shower is commonly reusable the next day, subject to the sealant’s cure. A full restoration is often a one-day job plus curing. Follow the technician’s instructions for the exact treatments applied to your shower, even if the surface feels dry sooner.
Get the right answer before spending on the wrong fix
A small patch on intact grout may need careful cleaning and better drying. A cracked grout line or failed bead of caulk needs different attention. If the same black marks keep coming back, the most valuable next step is to find out which problem you actually have, and whether the tile can stay.
Request a free video quote or on-site assessment with Team Grout by calling +1 289-277-0228 or emailing info@teamgrout.ca. Tell us what you have noticed and have photos ready if useful. We will review the enquiry, arrange the suitable appointment, and explain the proposed work and cost before you commit.