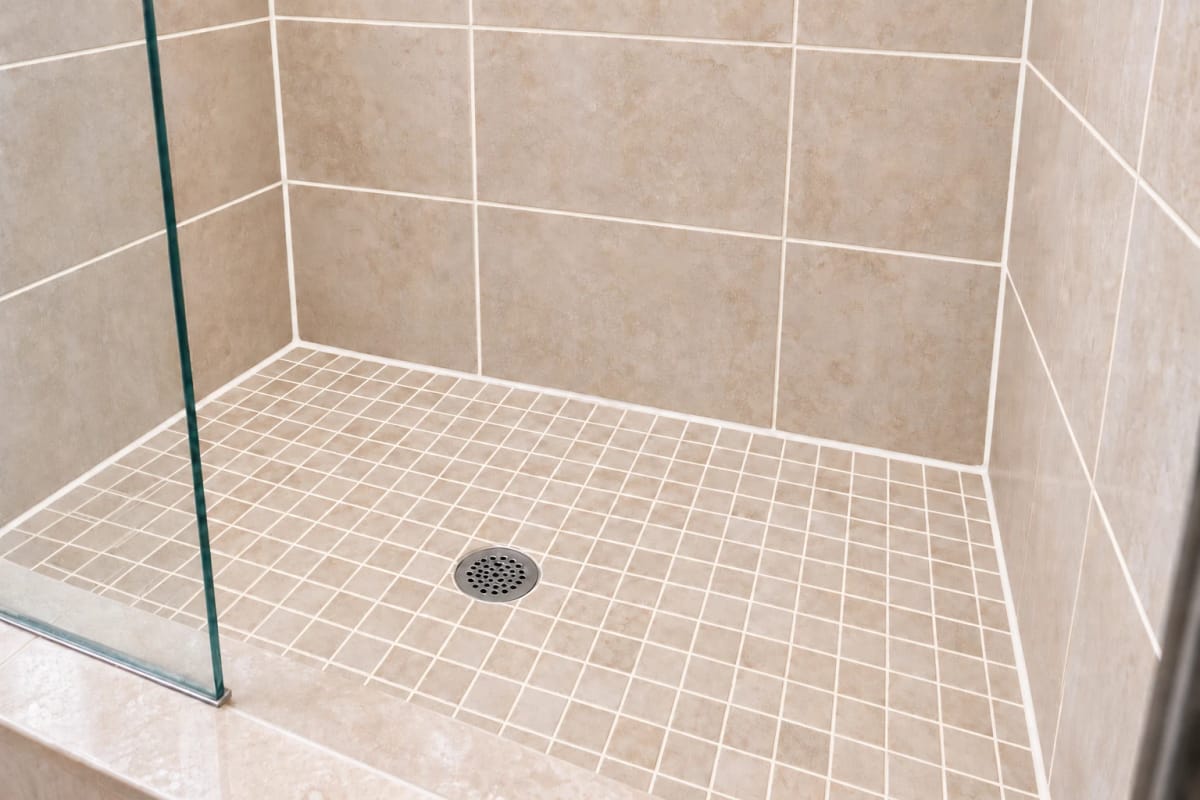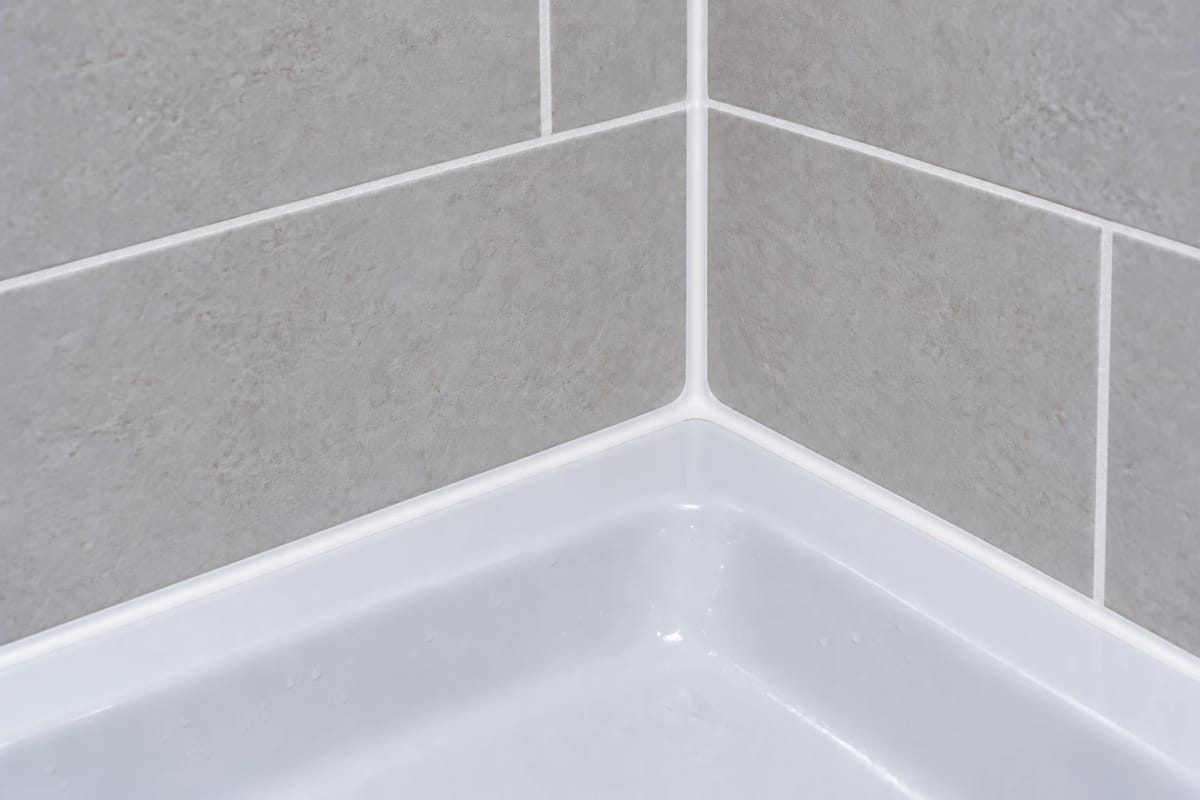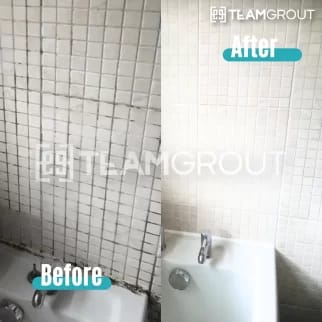
A tile and grout restoration professional can replace failed caulk around bathtub edges, shower niches, and the appropriate fixed joints beside shower glass. Team Grout handles this work in Toronto and the GTA: our technicians remove the old caulk completely, clean and dry the accessible joint, then apply and tool new mildew-resistant bathroom sealant. If the glass door itself is loose, a plumbing fixture leaks, or the wall is damaged, a different repair may be needed before recaulking makes sense.
The useful question is not just who owns a caulking gun. It is who can tell whether the failing bead is the whole problem. A sound tile surround with peeling silicone may need a focused caulking replacement. Cracked grout, persistent moisture, or a glass enclosure that drains incorrectly changes the scope. Getting the tile, floor, and caulking details right now is less troublesome than discovering later that a cosmetic repair concealed a continuing problem.
In brief: For deteriorated caulk at tub-to-wall joints, niche corners, shower corners, base perimeters, and suitable glass or door-frame gaps, start with a shower restoration or caulking replacement specialist. Ask whether the quote includes complete removal, joint preparation, a suitable sealant, and curing instructions. Seek diagnosis of plumbing, enclosure hardware, or concealed damage when the symptoms point beyond the accessible joint.
What counts as bathroom caulking replacement?
Caulking replacement means removing a deteriorated bead from an accessible joint, preparing the surfaces it touched, and installing a new flexible sealant suited to that joint. It is not the same as cleaning grout, filling a cracked grout line, or applying a grout sealer. The goal is a tidy, continuous seal where appropriate, along with a clearer understanding of what the surrounding surfaces need.
Many joints around a tub or shower are changes of plane, places where a wall meets a tub, another wall, a base, or a niche ledge. Those adjoining materials can move differently. Rigid grout and flexible caulk serve different purposes, so treating every visible line as interchangeable invites repeat cracking. Within a flat field of tile, damaged grout may need grout repair instead. At a wall-to-tub transition, the appropriate detail may be a flexible sealant.
A fresh bead is not a fresh start if the failed caulk stays underneath. New material needs suitable, clean, dry contact surfaces. A quick smear over separated silicone may look better for a moment while leaving the original adhesion problem in place. For a closer look at this distinction, read why complete old-caulk removal matters before recaulking.
Who should you call for each location?
The location helps identify both the right service and its limits. We use a simple distinction: is the joint failing, or is something behind or beside the joint failing? The first may be a surface restoration job. The second needs diagnosis before anyone promises that new silicone will solve it.
| What you notice | Who to call | What to check first |
|---|---|---|
| Peeling or missing caulk at a tub, shower corner, base, or niche, with surrounding surfaces sound | A shower caulking replacement or tile restoration professional, such as Team Grout | Which joints need full removal, whether adjacent grout also needs repair, and how long the new sealant must cure |
| Failed sealant at a fixed glass-to-tile or frame-to-wall joint | A caulking professional familiar with the enclosure details | Which seams the enclosure instructions call for sealing and which openings must stay clear for drainage |
| Glass door movement, damaged sweep, loose hardware, or persistent leaking around the door | The glass enclosure installer or a qualified glass service specialist | Door alignment, hardware, seals, tracks, and the enclosure design |
| Dripping valve, pipe, drain, or water appearing when the shower is not in use | A qualified plumber | The plumbing source before surface joints are refinished |
| Soft wall, loose tile, persistent odour, or recurring moisture damage | A contractor qualified to investigate tile assemblies and water damage | The condition behind the finish and whether installation repairs are necessary |
An experienced handyman may be appropriate for a straightforward, accessible caulking job. A shower restoration specialist is especially useful when the caulk, grout, and tile must be assessed together. That does not mean every tired-looking shower needs full restoration. The right recommendation may be just the failed joints, which is worth finding out before paying for more work.
Around a tub or shower base
Look along the full tub-to-wall line, not only at the darkest spot. A short visible gap can be connected to wider separation at a corner or behind a thick old bead. The assessment should consider the horizontal transition, the vertical corners nearby, and any grout damage next to them. Replacement should address the agreed failed sections rather than hiding them under another layer.
If water is escaping at the tub during use, do not assume the visible caulk is the only possible route. Fixture details, the surrounding tile, and the condition of the assembly also matter. A surface seal can renew the treated joint, but it cannot correct a leaking pipe or a damaged wall behind the tile.
Inside and around a shower niche
A niche packs several transitions into a small space: its sides, back, top, bottom, and outer edges. Narrow corners can hold soap residue and are awkward to work in without scuffing adjacent finishes. The person replacing niche caulk needs to identify the particular joints that require sealant, remove the old material carefully, and prepare a clean, dry surface before installing the new bead.
Pay attention if staining returns around the niche, water appears below it, or tile nearby feels loose. Recaulking an accessible edge is not a substitute for investigating a possible problem with the niche or the underlying shower construction. This is one of those places where doing the tile detail correctly matters as much as making the surface look crisp.
Beside fixed glass panels and shower doors
Some fixed glass-to-tile and frame-to-wall gaps are sealed; others are intentionally left open according to the enclosure design. Door sweeps, moving edges, tracks, and drainage openings have different jobs. Caulking every gap because it looks like a gap can interfere with intended drainage. The installer’s instructions for that enclosure should guide where sealant belongs.
If the problem is a loose panel, a misaligned door, a damaged sweep, or water repeatedly escaping despite sound static joints, ask for glass-enclosure service rather than another bead of silicone. If the issue is failed sealant at an appropriate fixed gap and the enclosure itself is sound, that may fit a focused caulking replacement.
Before anyone seals a glass track: identify the enclosure model or installation instructions if you have them. Ask which gaps are meant to drain. A neat bead in the wrong place is still the wrong repair.
How do you tell whether caulking alone is enough?
Our practical approach is to look at three layers: the visible bead, the adjoining finishes, and the symptoms beyond the surface. Homeowners do not have to diagnose all three. They can, however, describe what they see so the assessment focuses on the right questions.
Likely a focused caulking question
- The bead is peeling, cracked, missing, or separated.
- Dark discolouration appears embedded in old silicone.
- The adjacent tile and grout appear sound.
- There is no persistent odour, loose tile, or visible wall damage.
Ask for a wider assessment
- Grout is cracked or missing beside the joint.
- The same caulk fails repeatedly.
- Tile moves, the wall feels soft, or moisture reappears.
- Water escapes from a door or plumbing fixture despite apparently sound caulk.
Mould embedded in silicone generally calls for removal and replacement rather than another round of surface cleaning. Where affected accessible surfaces need treatment, that treatment belongs in the preparation, before the new finish. It does not establish that hidden mould has been removed, and mould-resistant sealant does not mean mould can never return. Our related article on treating affected joints before installing new shower caulk explains why that order matters.
Dirty but intact grout is a different problem from cracked grout. Deep cleaning can address buildup; grout repair addresses missing or broken material; colour sealing can refresh compatible grout colour; clear penetrating sealing helps suitable porous surfaces resist staining without changing their appearance. None of these is a substitute for replacing failed caulk. If several symptoms appear together, a combined shower restoration may be more sensible than a narrow repair. If they do not, there is no reason to turn a single failing tub joint into a full shower project.
What happens during professional caulking replacement?
The finished bead is the part you see. Preparation is what gives that bead a suitable surface to contact. For a typical accessible shower joint, the work follows a clear sequence, adjusted for the materials and condition found during assessment.
- Assess the scope. Identify each tub, niche, corner, base, or fixed glass joint in question. Check nearby tile and grout, note prior repairs, and separate surface deterioration from signs that need further investigation.
- Remove failed caulk completely. Old silicone is taken out of the agreed joints rather than sealed over. Care around tile edges, tubs, glass, and metal matters during removal.
- Prepare the exposed joint. Residue and buildup are scraped or cleaned as appropriate. Affected accessible surfaces can be treated and disinfected where needed, followed by suitable cleaning and drying. Products and methods must suit the materials involved.
- Apply and tool new sealant. A suitable mildew-resistant bathroom sealant is installed at the joints that should be sealed. The bead is finished for consistent contact and a clean edge, without closing enclosure openings intended to drain.
- Inspect and explain aftercare. The technician checks the accessible finished joints and gives the homeowner the product-specific dry-use guidance before the tub or shower goes back into service.
We protect surrounding areas and handle the removal, preparation, application, and cleanup for the agreed work. Cleaning or repairs to neighbouring tile and grout are identified separately if needed. That distinction matters: a quote for recaulking and a quote for a shower restoration may both improve appearance, but they involve different work underneath.
How long does assessment, work, and curing take?
There are three separate clocks: getting the assessment scheduled, doing the work, and waiting to use the wet area again. Assessment timing and appointment availability depend on the project and location. After reviewing the concern, we arrange a suitable free video quote or on-site assessment and confirm the appointment details with you. An enquiry or written-quote request starts that conversation; it is not itself a confirmed appointment.
For a focused shower caulking replacement, the on-site work is generally described as taking a few hours. Access, joint length, the amount of old silicone, niche details, and glass edges can affect the actual scope. If the shower also needs deep cleaning, grout repair, or colour sealing, a full residential shower restoration is commonly described as one day of work, followed by curing. The assessment determines which description fits your bathroom.
After recaulking, a shower is typically reusable the next day, subject to the sealant’s specified cure and the technician’s instructions. Do not treat the end of the technician’s visit as permission to get the joint wet. Drying and curing are part of the job, not optional waiting time. If a separate grout sealer or other finish is included, follow the instructions for that treatment as well; its timing may differ from the caulk.
What will it cost, and what should a quote include?
There is no useful universal price for caulk around tubs, niches, and glass. The cost depends on how many joints need replacement, their length and access, how much failed material must come out, the condition underneath, and whether related cleaning or grout work is required. A video or on-site assessment helps answer what your property needs. The resulting quote should answer what work is proposed and what it will cost.
When comparing written quotes, look for the actual scope:
- Are the tub, niche, shower corners, base, and glass joints listed clearly?
- Will failed caulk be removed completely from the joints being treated?
- What cleaning, accessible treatment, and drying are included?
- Is damaged grout being repaired, or is the quote for caulking alone?
- How will the glass enclosure’s drainage details be respected?
- When can the shower get wet again, and what aftercare is recommended?
- Does the quote describe any limits, such as suspected damage beyond accessible surfaces?
Two quotes. Same service name. Very different work underneath. A lower number is not informative unless you know whether it pays for a new bead over old material or complete removal and preparation. If you are weighing caulk replacement against broader grout work, the difference between cleaning and full grout restoration can help you read those scopes with less guesswork.
What have homeowners experienced with this work?
Real results help make the process less abstract, provided the work described matches the comparison. In a Google review, Cynthia C said Alexia did a great job with recaulking and a deep clean of their bathroom and appreciated the care taken to do a proper job. That is an example of combined work, not a claim that caulking alone produced the entire change.
“Alexia did a great job with recaulking and deep clean of our bathroom! Grateful she took the care to do a proper job!”
Cynthia C, Google review
Francis Hsue described Gabriel cleaning, sealing, and recaulking a main shower room. Nick G described a shower restoration in which tiles were cleaned, grout was filled, and the shower was recaulked. These are useful examples because they show why the assessment matters: sometimes the caulk is the project, and sometimes it is one part of restoring the surrounding surfaces. Results depend on the starting condition and the agreed work. A refreshed surface should never be mistaken for proof that a concealed leak has been repaired.
What do you need to do before and after an appointment?
You do not need to learn every technical term before asking for help. To start, give us your contact details, general location, the area involved, and a short description of what is happening. Mention whether it is a tub, niche, corner, shower base, or glass enclosure, and whether you have noticed leaking, repeat separation, or damaged grout. A wider photo plus a close-up of the failing joint can help us prepare; up to five relevant photos may be included where the request allows. Photos support the review but do not always replace a video or on-site look.
After your request, a team member follows up to discuss the concern and arrange the suitable assessment option. Confirm the appointment time and format during that exchange. Keep any existing photos and details handy so you can refer to them without starting your explanation from scratch. If you submit a written-quote request, it is a request for review and follow-up, not an instant exact price based on limited information.
Before the work visit, clear toiletries and loose items from the affected area and make the bathroom accessible. Let us know about previous caulking, cleaners, sealers, or repairs that might affect preparation. We handle the agreed surface work and explain when to resume using the tub or shower. Afterwards, allow the stated cure time, follow the cleaning guidance for your surfaces, and keep an eye on any recurring gap, odour, or moisture. A new shower, or a newly restored one, still benefits from looking after its joints.
Best practices for longer-lasting bathroom joints
No surface treatment guarantees that moisture problems will never return. These habits give the work a fair chance and make new issues easier to spot.
- Repair the right material. Replace failed silicone rather than trying to colour-seal it. Repair cracked grout where appropriate instead of disguising a missing section with caulk.
- Respect preparation and cure. Keep the joint dry for the period specified after installation. Avoid applying cleaners or a new coating over uncured sealant.
- Check glass drainage details. Do not fill every opening around a track or door. Follow the enclosure’s installation requirements and investigate a faulty sweep or moving panel separately.
- Watch for repeat patterns. Caulk that separates repeatedly, grout that keeps cracking, or mould that quickly returns deserves another look at movement and moisture, not just another cosmetic pass.
- Care for adjacent finishes. Suitable tile and floor cleaning, timely grout repair, and compatible protection where appropriate help keep the surrounding surfaces easier to maintain. Clear grout sealer is not waterproofing, and not every surface needs sealing.
If you are unsure whether dark material is sitting on the surface or embedded within the silicone, our guide to mould on shower caulking explains why cleaning and replacement are different decisions.
Frequently asked questions
Can someone replace caulk around a tub without replacing the tile?
Yes, when the tub, tile, and surrounding assembly are sound and the problem is limited to accessible failed caulk. The old bead can be removed and the joint prepared for new sealant while the existing tile stays in place. Loose tile or recurring moisture changes that recommendation.
Who replaces caulk inside a shower niche?
A professional experienced with shower joints and tile finishes can assess and replace deteriorated caulk at the appropriate niche transitions. Because the corners are narrow and the niche has multiple exposed edges, the assessment should also check adjacent grout, tile, and signs of moisture beyond the visible joint.
Should every gap around shower glass be caulked?
No. Fixed joints may need sealant, but some enclosure openings are meant to drain and moving edges may rely on sweeps or other parts. The enclosure instructions determine which gaps should be sealed. A loose door or damaged hardware calls for glass-enclosure service, not indiscriminate caulking.
Can new silicone go over old silicone?
For a failed joint, covering the old silicone skips the removal and surface preparation needed for a proper replacement. The old material should be removed from the agreed joint, then the accessible surfaces cleaned and dried before new sealant is applied.
Will replacing mouldy caulk remove mould from behind my tile?
No. Removing affected silicone and treating accessible surfaces addresses what the technician can reach. It does not establish what is happening behind tile or inside a wall. Persistent odours, soft areas, or recurring visible mould can require further investigation.
How soon can I use the shower after recaulking?
For a focused shower caulking replacement, next-day use is typical, but follow the actual sealant instructions and the technician’s job-specific guidance. If additional cleaning, grout repair, or sealing is included, those finishes may have their own curing requirements.
Should I request caulking replacement or full shower restoration?
If the tile and grout are sound and only the sealant is failing, focused replacement may be enough. If buildup, missing grout, inconsistent grout colour, and failed caulk all need attention, a combined restoration may be appropriate. An assessment separates those scopes before the quote sets a price.
Find out what your joints actually need
For a peeling tub edge, a dark niche corner, or a questionable seal beside glass, the most useful next step is one assessment, not a guess at which service to buy. Tell Team Grout what you see and where you are in Toronto or the GTA. We can arrange a free video quote or an on-site assessment based on suitability, location, and availability, then provide a written scope and price for the work proposed.
Have a few photos and a description of any recurring moisture or previous repairs ready. Call +1 289-277-0228 or email info@teamgrout.ca to request that assessment. If caulking replacement is all your shower needs, that is useful to know before spending on anything larger.