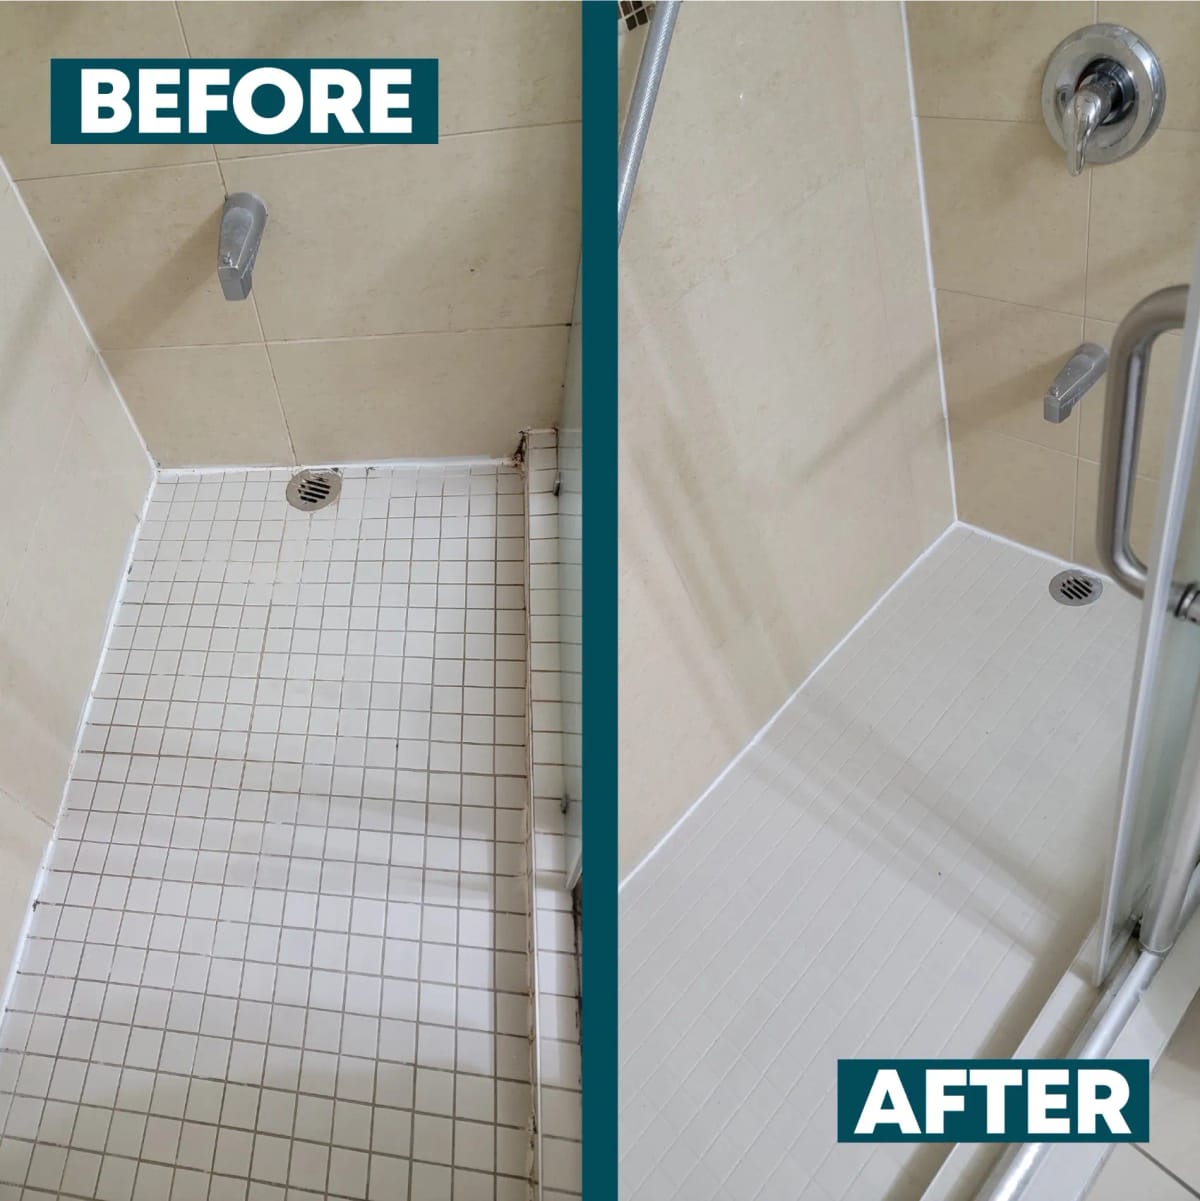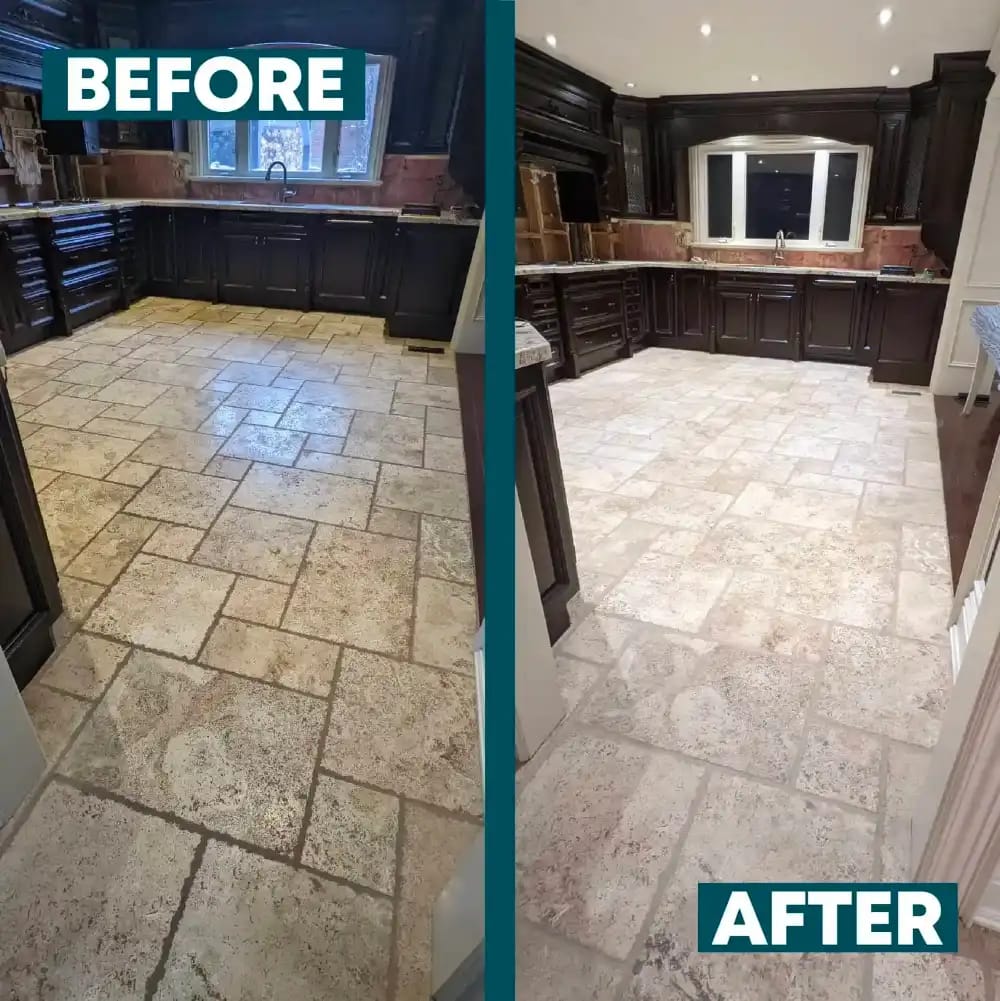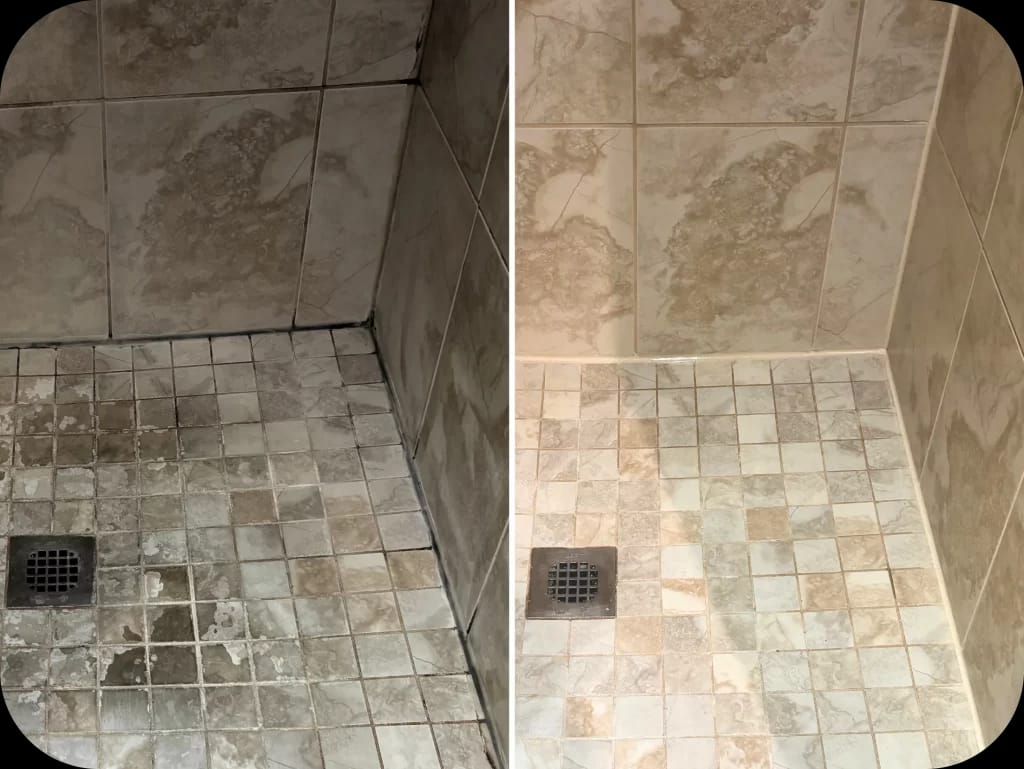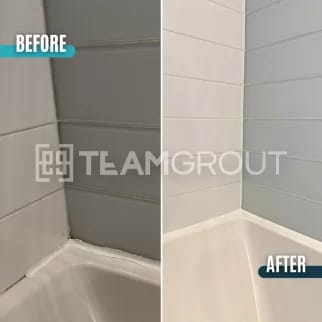
Shower mould needs professional attention when it keeps returning, is embedded in failing caulking, appears beside cracked grout or loose tile, or comes with a persistent musty smell or signs of water damage. A small mark on sound, accessible tile may be a cleaning job. Mould associated with damaged materials or an ongoing moisture source is a different problem: removing the visible mark alone will not fix what is allowing it to return.
The first decision is whether the problem is limited to surfaces you can see and clean, or whether the shower needs repairs or investigation behind those surfaces. For Toronto and GTA homeowners, Team Grout can assess accessible tile, grout, shower-floor and caulking conditions and recommend cleaning, caulking replacement or restoration where suitable. If the signs point to a leak or damaged material behind the tile, that needs to be addressed before a surface finish is treated as the solution.
What does professional shower mould removal mean?
In a tiled shower, the phrase can describe very different work. It might mean cleaning affected tile and sound grout. It might mean removing silicone that has mould embedded in it, preparing the exposed joint and applying new caulking. Or it might mean repairing damaged grout and restoring the shower’s accessible surfaces. Those are not interchangeable with investigating and repairing hidden water damage.
Here is a useful distinction: surface restoration addresses the materials you can reach; building remediation addresses affected materials and moisture problems that may be concealed. A shower can look considerably better after surface work without that result establishing what is happening inside a wall. Equally, not every dark line means the tile must come out. The condition of the joints, tile and surrounding materials determines the next step.
Colour alone cannot tell you what type of mould is present or whether it is growing behind a wall. What you can observe is more useful for deciding whom to call: where the mark appears, whether it comes back after cleaning, whether a joint has failed and whether surrounding materials show signs of dampness.
When should you stop treating it as a routine cleaning job?
The same growth returns after cleaning
If a mark repeatedly reappears in the same corner or along the same joint, look beyond the cleaning product. That area may stay wet, the caulking may no longer be bonded, or a grout gap may be collecting buildup. Notice whether the shower dries between uses and whether the mark sits on a cleanable surface or within a deteriorating material.
Recurrence does not prove there is a hidden leak. It does mean another round of scrubbing may give you the same short-lived answer. For a closer look at the possible causes, see our article on why mould keeps returning to your shower.
Dark marks are embedded in peeling or cracked caulking
Silicone at corners, around a tub or shower base, or along other applicable joints should remain firmly attached. If it is lifting, splitting, gapped or visibly deteriorated, cleaning its surface will not restore the joint. Mould embedded inside old silicone generally calls for removal of that silicone rather than repeated attempts to clean through it.
A fresh bead is not a fresh start if the failed caulk stays underneath. Proper replacement involves removing the old silicone completely, cleaning and disinfecting the exposed joint, drying it, then applying and tooling new waterproof, mildew-resistant caulking. The condition underneath matters as much as the neat line you see afterwards.
Grout is cracked, missing or repeatedly dark in the same spots
Cracked grout and missing pieces need a different response from intact grout with surface buildup. Damaged lines can hold deposits, and pits can make grout look uneven even after a careful clean. Filling cracks or replacing failed sections addresses a material problem that a brush cannot fix.
Check the wall-to-floor transition, shower floor and corners as well as the most obvious wall tiles. These areas take regular exposure. Getting the floor, grout and caulking details right matters if you want a refreshed shower that remains practical to maintain. Our guide to grout cleaning versus full grout restoration explains the difference in more detail.
There is a persistent musty smell or evidence of water outside the shower
A smell that remains after the shower is cleaned and allowed to dry deserves investigation. So do staining on a nearby wall or the ceiling below, dampness outside the enclosure, swelling at trim, a soft wall area or tile that moves. None of these signs can be diagnosed from a blog post, but they change the question from how to remove a mark to where the moisture is going.
Do not rely on new caulk, grout colour sealer or a surface treatment to resolve a plumbing leak or failed underlying waterproofing. If a wall assembly or other concealed material is affected, the source and extent of that damage need to be determined before the visible shower is refinished.
The affected area extends onto other building materials
Mould visible on drywall, a ceiling, trim or other moisture-damaged materials is not the same scope as spots on accessible tile. These materials and the space behind them may need investigation and repair. If contamination is widespread or a leak has affected the structure, arrange appropriate building and mould-remediation assessment rather than assuming shower cleaning will cover it.
According to Health Canada’s guidance on addressing moisture and mould indoors, the size of a visible area is one factor in assessing a problem, but recurrence and the source of moisture also matter. A small patch beside a soft wall can be more concerning than a larger patch of buildup on otherwise sound, accessible tile. There is no useful shortcut that replaces looking at the materials and the moisture.
When might careful homeowner cleaning be enough?
If the mark is small, confined to an accessible tile or glass surface, and the grout and caulking are sound, ordinary cleaning may be a reasonable first step. This is especially true when there is no known leak, no musty smell after drying and no repeated growth in the same spot. The aim is to remove the surface buildup and keep the area able to dry, not to coat over it.
Choose a cleaner suitable for the actual material and follow its label. Natural stone needs different care from ceramic or porcelain; acidic bathroom cleaners, vinegar and descalers can damage acid-sensitive stone. Do not combine cleaning products or improvise a chemical mixture. If you cannot safely access the area, the material is deteriorating or cleaning does not hold, move to an assessment rather than stronger scrubbing.
Not sure whether a dark line is mould, staining or damaged grout? You do not need to identify it by appearance alone to take the sensible next step. Note where it is, whether it changes after cleaning and whether the joint feels intact. Those observations are more helpful than guessing from the colour.
How we decide which shower work fits
Our practical framework starts with surface, joint and moisture. First, identify what is affected: sound tile, sound grout, damaged grout, silicone or surrounding building material. Next, check whether the joints are intact. Finally, ask whether moisture is staying where a shower is designed to handle it, or appearing elsewhere. Each answer changes the scope.
1. Assess the surfaces and the pattern
We look at accessible walls, the shower floor, grout lines, corners and caulking, including ledges or niches where applicable. We ask what has already been cleaned and whether the marks return. A whole-shower view shows the layout; a close-up shows whether a line is dirty, cracked or separating. Photos help us prepare, but a video or on-site review may still be needed to understand the joint and material condition.
2. Match cleaning to sound materials
When the tile and grout are intact and buildup is the main issue, professional shower deep cleaning may be appropriate. The work can address tile, grout, the shower floor, corners and glass with suitable products and equipment, followed by rinsing or extraction and an appropriate clear sealer. Cleaning can improve a tired-looking surface without removing sound tile, but it does not mend a gap or reattach silicone.
3. Replace failed caulking instead of coating over it
If the problem is concentrated in deteriorated silicone while the surrounding tile and grout remain sound, focused caulking replacement may be enough. Complete old-caulk removal and joint preparation are part of the work, not optional cosmetic details. The replacement bead helps restore the joint’s intended water resistance; mildew-resistant caulking does not make future growth impossible.
4. Repair grout and restore suitable showers
When cleaning alone leaves cracks, holes or uneven grout appearance, a broader restoration may combine deep cleaning, treatment of affected accessible surfaces, grout repairs, grout colour sealing where suitable and caulking replacement. Preparation includes treating affected surfaces, a final cleaning and rinsing stage, and adequate drying before the chosen finish. The particular treatment sequence and materials depend on the surface and the work agreed for that shower.
Clear penetrating sealing and grout colour sealing serve different goals. Clear sealer can help compatible absorbent surfaces resist staining while retaining their existing look. Colour sealing can make compatible grout lines look more consistent and improve stain resistance. Neither is a repair for hidden leaks, a substitute for missing grout or a guarantee against future mould.
5. Investigate signs that point beyond the surface
If the shower has loose tile, a soft wall, ongoing water escape or a persistent smell, the sensible order is to establish the moisture problem before selecting a finish. Surface treatment cannot show that a concealed cavity is dry or that affected material behind tile has been removed. Sometimes the most useful assessment result is clarity that the next work should address the building assembly, not just the visible grout line.
What results are realistic?
If the existing tile is sound, you may not need to replace it to get a noticeably refreshed shower. Cleaning can lift accessible buildup; repairs can close gaps in suitable grout; colour sealing can give grout a more even appearance; and new caulking can replace a visibly failed joint. The result should be described by the work actually done, not as though one cleaning product accomplished every change.
Customers’ accounts offer a useful picture of what combined work can achieve. In a Google review, Nick G described his shower restoration this way: “The tiles shine, the grout was filled in and it was re-caulked.” Francis Hsue wrote that Gabriel cleaned, sealed and recaulked a main shower room. Those are examples of work that involved more than wiping away a mark. The recommendation for your shower still depends on what an assessment finds.
There are honest limits. Some discoloration may reflect a damaged material, not removable dirt. Sound tile may stay in place, but loose tile or moisture-damaged backing changes the plan. A surface can be made easier to maintain without becoming maintenance-free. Our goal is to explain what the proposed work will change and what it will not.
How long does assessment, work and curing take?
Assessment and scheduling are separate from the work appointment. Tell us your location, the type of shower, what is affected and whether you have noticed leaks or recurring growth. Depending on suitability, location and availability, we can arrange a free video quote or an on-site assessment. Sending an enquiry starts the review and follow-up; the appointment is confirmed when the time and assessment format have been arranged with you. If additional information is needed, the follow-up should focus on that gap rather than making you restate the whole problem.
Once the scope is clear, these service-specific work periods can help you plan:
- Shower deep cleaning: Most residential showers are described as taking about half a day. If a sealer is applied, follow the technician’s wet-use instructions before showering.
- Shower steam cleaning: Most residential showers are also described as taking about half a day. Steam can clean suitable sound surfaces, but it cannot repair cracked grout or remove mould embedded inside silicone.
- Caulking replacement: Work is generally described as taking a few hours. The shower is typically reusable the next day, subject to the sealant’s required cure.
- Full shower restoration: Most residential showers are described as one-day jobs, followed by curing for the grout, sealer or caulking used. The technician gives the exact return-to-use time for the completed scope.
A one-day job does not necessarily mean a shower that is ready to use that evening. Drying during preparation and curing after the finish are distinct parts of the timeline. Ask for the wet-use time in the quote or at completion so the first shower does not undo careful joint work.
What do you need to prepare, and what will it cost?
You do not need to choose a treatment before contacting us. Have your location, contact details and a short description of the concern ready. It helps to note whether the marks return, identify any known water damage and point out which shower walls, floor areas or joints concern you. A whole-shower photo and close-ups of the affected grout and caulking are useful supporting information. They may help prepare the assessment, but they do not always replace a video or on-site review.
For a scheduled work visit, clear bottles, mats and personal items from the shower so the affected surfaces and joints can be reached. We handle the agreed cleaning, preparation, repairs, sealing or caulking work. Your main tasks afterwards are to keep the shower unused for the instructed cure period and follow the cleaning and drying guidance for its materials.
The price depends on what the shower actually needs: its size, buildup, joint length, grout damage and whether the scope is cleaning, caulking replacement, restoration or a combination. A free assessment is meant to answer what does this property need? The written quote then answers what work is proposed, and what will it cost? A written-quote request made with limited details is a request for review and follow-up, not a promise of an instant exact price from photos alone.
Two quotes may carry the same service name but describe very different work underneath. Before comparing prices, ask whether the scope includes old-caulk removal, exposed-joint cleaning, grout repair, the shower floor, the proposed finish, curing instructions and any limitations. That comparison tells you much more than the heading “mould removal” on its own.
Best practices after the shower is cleaned or restored
- Give the shower a chance to dry. Use working bathroom ventilation during and after showering. Remove standing water from ledges and the base when practical, and pay attention to spots that stay damp.
- Watch the joints. Look for peeling caulk, new gaps or recurring grout cracks, particularly where walls meet the floor or shower base. Addressing a failed joint early is more useful than hiding it under another bead.
- Clean for the material you have. Use a suitable cleaner for the tile, grout or stone finish and follow product directions. A stronger product is not automatically a better one.
- Understand what protection does. An appropriate sealer can help suitable surfaces resist staining. Clear sealer is not waterproofing, and neither sealer nor mould-resistant caulking means mould can never return.
- Take recurrence seriously. If growth or a musty smell persists despite surface care, ask what is keeping the area wet. Repeatedly covering the mark postpones the useful question.
The same care matters after a new installation. Tile, shower-floor details, grout and caulking need to be appropriate for their location and maintained as the shower ages. A new finish cannot compensate for an unresolved water problem underneath.
Frequently asked questions
Does black mould in shower grout always mean the wall must be opened?
No. Colour cannot establish what is happening behind the tile. Intact grout with a limited surface mark is different from loose tile, soft wall material, a leak or recurring odour. The surrounding conditions determine whether surface care or further investigation makes sense.
Can mould be cleaned out of old silicone caulking?
Surface cleaning may remove buildup sitting on the silicone. When dark material is embedded inside deteriorated silicone, replacing the old caulking is generally the more appropriate approach. Putting fresh silicone over a failed bead leaves the failed material underneath.
Will steam cleaning fix a mouldy shower?
Steam cleaning can be suitable for accessible tile and sound grout with buildup. It will not repair cracked grout, renew a separating joint or remove mould embedded in old silicone. The material’s condition decides whether cleaning alone is enough.
Should I replace the whole shower if mould keeps coming back?
Not automatically. Sound tile can often be retained when the problem is accessible buildup, damaged grout or failed caulking that can be addressed appropriately. If tile is loose or concealed water damage is suspected, find out what is happening behind the finish before deciding whether restoration or more extensive repair is needed.
Does grout sealing stop mould permanently?
No. A compatible sealer can help with stain resistance and maintenance, but it does not eliminate moisture, repair a leak or make the shower permanently mould-free. Ventilation, drying and intact joints still matter.
Can I get an exact cost by sending a picture?
Pictures can show the layout and visible condition, especially when you include both an overview and close-ups. They may not show whether caulk is firmly bonded, grout is loose or moisture is affecting concealed materials. A free video quote or on-site assessment, selected according to suitability, location and availability, helps establish an appropriate scope before a written price is set.
How soon can I shower after caulking replacement or restoration?
After caulking replacement, the shower is typically reusable the next day, subject to the sealant’s cure. Full restoration may involve several materials with different curing needs. Follow the technician’s project-specific wet-use time rather than assuming the shower is ready as soon as the visible work is finished.
Get an answer before choosing a treatment
If the same mark keeps returning, the caulking is failing or the grout is breaking down, your next step is a free video quote or on-site assessment, depending on what is suitable for your location and shower. Tell us what you have noticed and send photos if helpful. We will review the accessible surfaces, explain the work that fits and provide a scope and price before you decide. That is how Team Grout helps Toronto and GTA homeowners move from guessing at a mould-cleaning product to knowing what their shower actually needs.