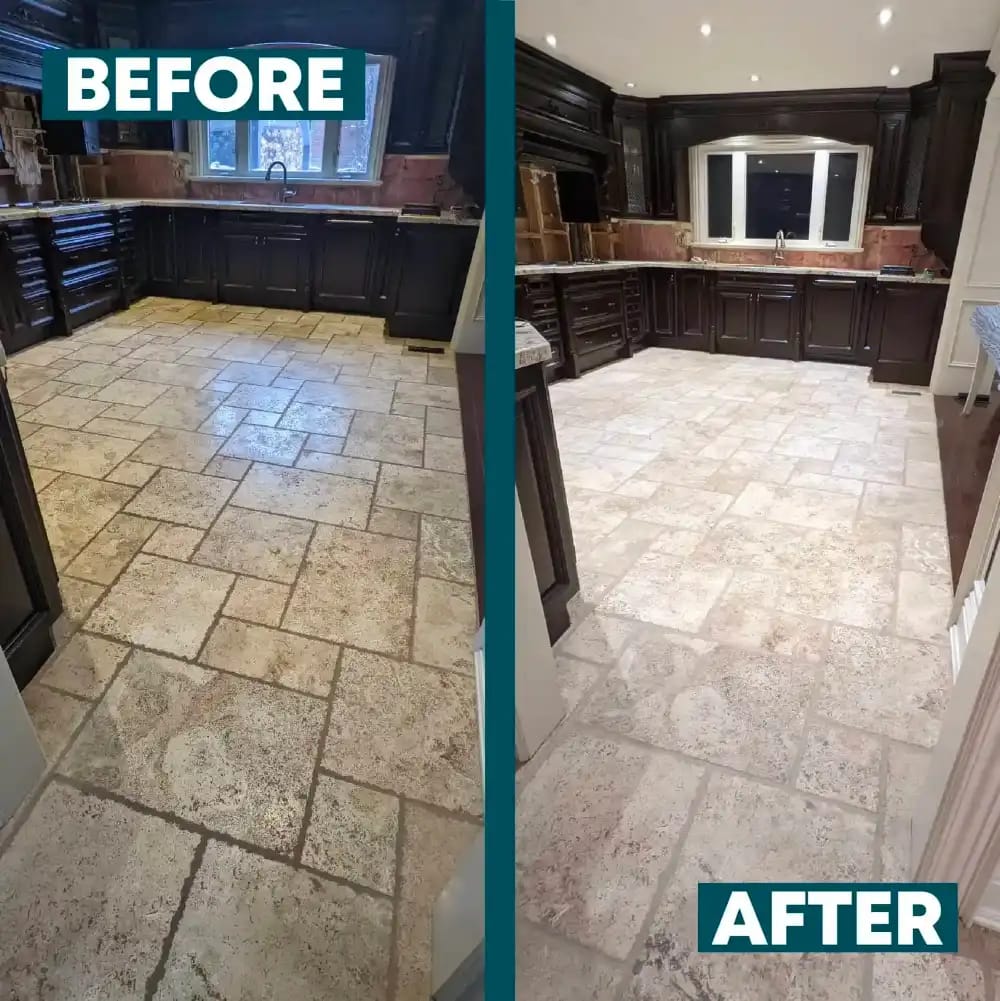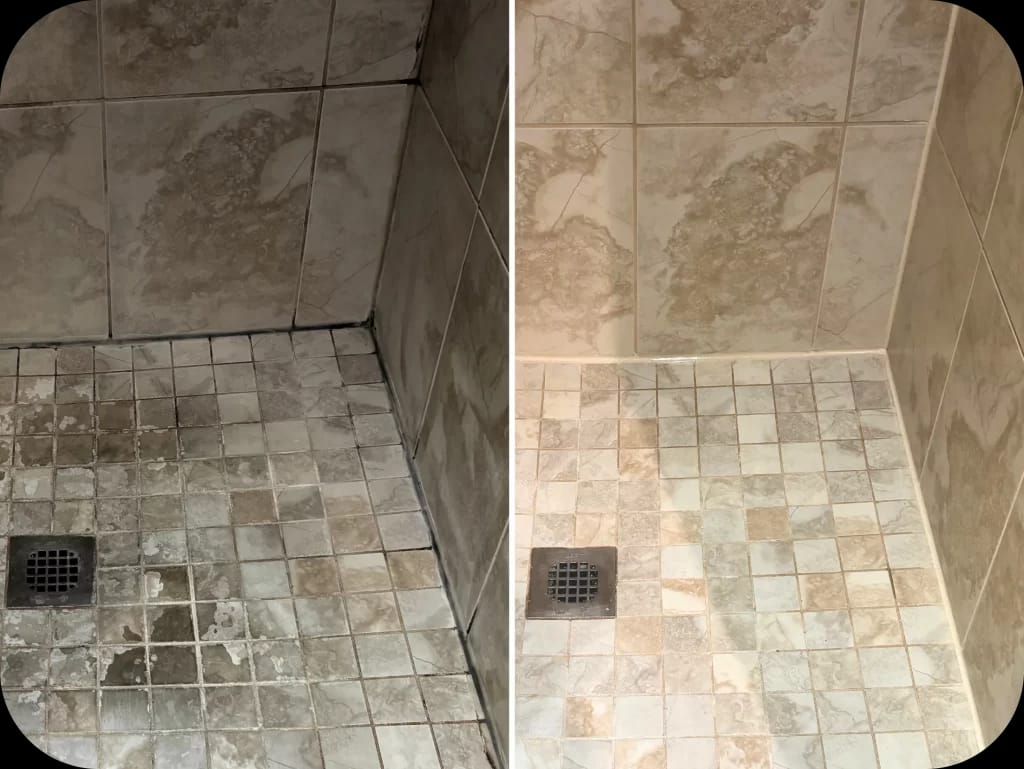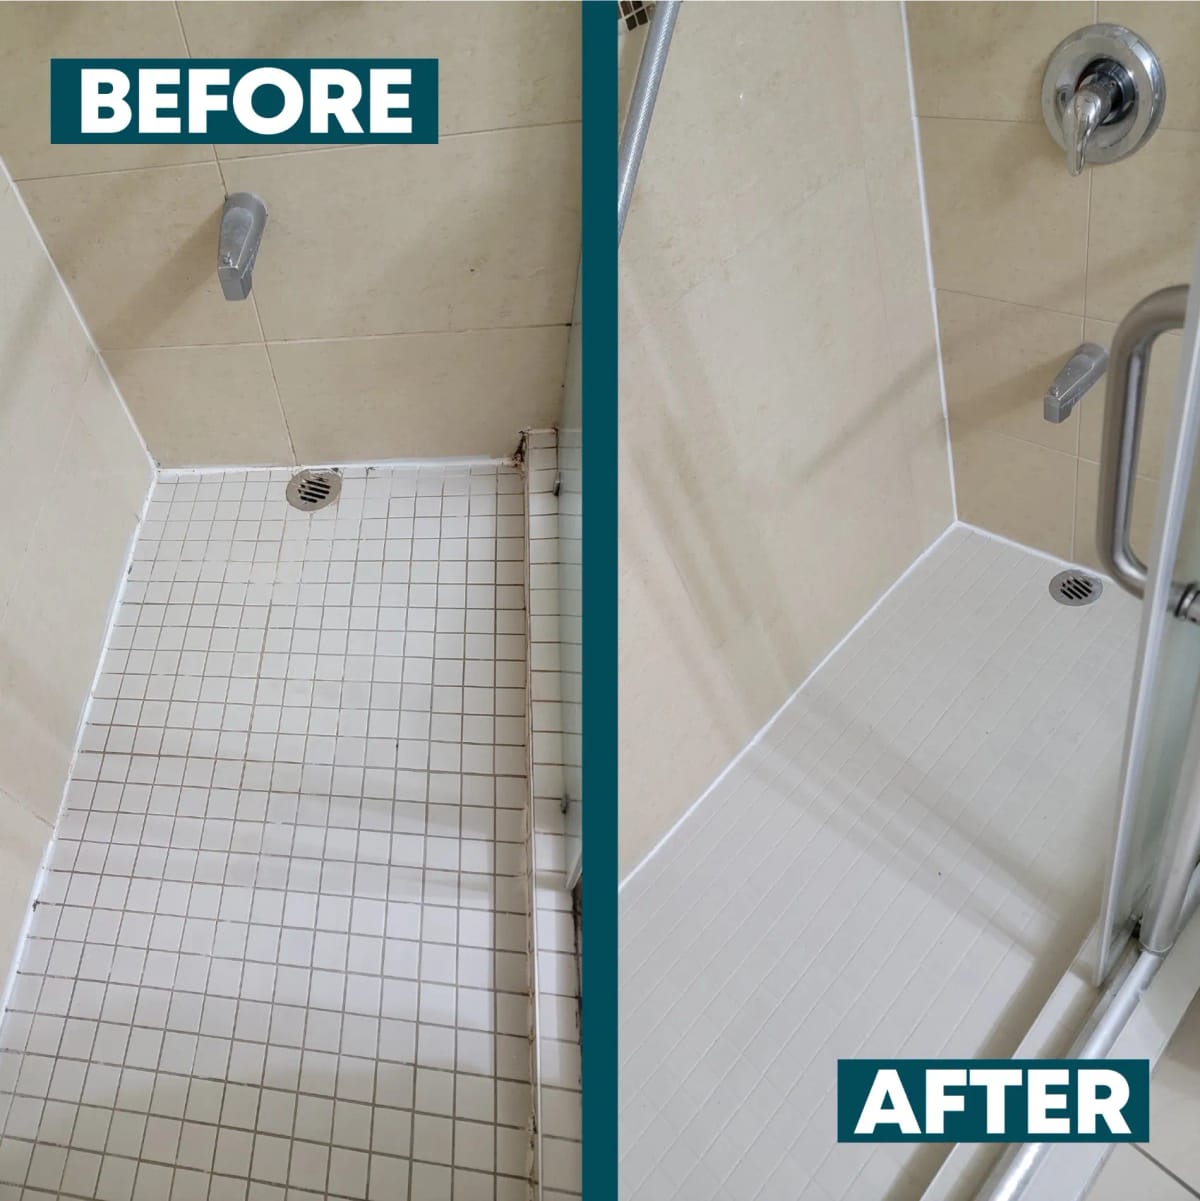
DIY grout cleaning is a sensible choice for light soil on a small area of intact grout. Professional grout cleaning is the better choice when dark grout stays dark after careful scrubbing, buildup covers a large floor or shower, or you are unsure whether the problem is dirt at all. Cracked grout, failed caulking and uneven colour need different solutions. At Team Grout, we start by identifying which problem you have, so the work addresses the surface rather than just making it look cleaner for a moment.
The distinction matters because cleaning removes buildup, while restoration repairs damaged grout, caulking replacement renews failed joints, and sealing provides appropriate surface protection. None of those services is a substitute for repairing a hidden leak. The tile may be fine. The grout is stealing the spotlight, but the grout is not always the whole story.
If you want a refreshed appearance and easier maintenance without buying a service you do not need, use the condition of the grout and surrounding joints to decide where to start. A small patch of sound grout may only need careful home cleaning. A shower with separated caulk or a floor with missing grout deserves an assessment before another round with the scrub brush.
What counts as professional grout cleaning?
Professional grout cleaning is a material-specific process for removing accumulated soil from tile and intact grout. On suitable tiled surfaces, trained technicians use cleaning products selected for the material and buildup, machine-powered bristle brushes, and a thorough cleaning and rinsing process. Where suitable, cleaning can be followed by clear grout sealing. The aim is to lift dirt from sound grout lines while treating the tile and surrounding finishes appropriately.
DIY cleaning uses household tools and a compatible cleaner to maintain the same surfaces. It can work well when the soil is recent and accessible. The difference is not simply that one person has a bigger brush. A professional assessment can distinguish embedded dirt from discolouration, worn finishes, cracks or gaps that no cleaner will fix.
Cleaning also differs from full grout restoration. If a joint has pits, holes or missing pieces, we may need to repair it line by line and then consider a suitable finish. Missing grout can make a floor look persistently dirty because the broken lines catch light differently. More scrubbing will not put the grout back.
Professional cleaning versus DIY: which problem are you solving?
| What you see | DIY approach | Professional approach |
|---|---|---|
| Light dirt on sound grout | Clean a small area with a surface-compatible product, rinse and dry. | Usually worth considering if ordinary maintenance is no longer giving the result you want. |
| Dark grout across a large floor | Manual scrubbing is possible, but it takes time to agitate and rinse every line evenly. | Assess tile type and buildup, then use appropriate equipment and cleaning products on suitable surfaces. |
| Shower soap scum or mineral buildup | Clean accessible deposits carefully with products compatible with the tile and grout. | Assess buildup, corners, grout and caulking together; deep cleaning may be sufficient if the joints are sound. |
| Cracked or missing grout | Cleaning can remove dirt around the damage but cannot repair it. | Assess grout repair or restoration rather than selling cleaning as a fix. |
| Peeling or mould-affected caulk | Cleaning may improve the surface, but it cannot renew a failed bead. | Assess complete caulking removal and replacement, including joint preparation and drying. |
| Uneven grout colour that remains after cleaning | Further scrubbing may not make the lines uniform. | Assess whether grout colour sealing is suitable for a more consistent finish. |
The best choice is therefore based on condition and desired result, not just on whether you own a brush. For intact grout with ordinary dirt, start small at home. For extensive buildup, persistent discolouration or uncertain joint condition, professional assessment can save you from paying for repeated cleaning that cannot produce the result you want.
When DIY grout cleaning makes sense
Home cleaning is useful maintenance. A small backsplash with food splashes or a bathroom floor with light surface soil may respond to careful cleaning if the tile, grout and nearby caulking are sound. You remain in control of the timing, and you can see how a test area responds before tackling the rest.
A practical home-cleaning sequence
- Identify the surface. Check whether you are working on ceramic or porcelain tile, natural stone, or another finish. If you are unsure, avoid choosing a cleaner on the assumption that all tile tolerates the same products.
- Inspect the joints first. Look for missing grout, cracks, loose tile and caulk that has pulled away from an edge. Photograph any problem areas before cleaning so you can tell whether the condition changes.
- Remove loose debris. Sweep or vacuum a floor before adding cleaner. In a shower, remove loose items and surface debris so you can reach the grout lines.
- Use a compatible product. Follow its label, including dilution, dwell time and rinsing instructions. For marble, limestone and travertine, use stone-safe, acid-free care rather than vinegar, lemon or a bathroom descaler.
- Work gently on a test section. Use a suitable soft or nylon brush without grinding at worn edges. A small test tells you more than an aggressive attempt across the entire room.
- Remove the loosened soil. Rinse and collect dirty solution rather than letting it settle back into grout lines. Allow the surface to dry, then judge the appearance in normal light.
If a test patch improves but the whole floor would require extensive manual work, that is a reasonable point to compare DIY effort with professional cleaning. If the patch does not improve, stop and investigate the cause. Another cleaner may not help if the issue is worn grout, staining, a failed coating or a damaged joint.
Avoid mixing cleaning chemicals or experimenting with a homemade chemical recipe. Stronger is not automatically better, especially around natural stone, existing sealers and caulking. Acidic products can etch acid-sensitive stone, and scrubbing cannot restore an etched finish.
What a professional process adds
Our approach begins with a decision about the surface, not a promise that every dark line will come clean. The useful question is: What needs cleaning, what needs repair, and what, if anything, needs protection? That sequence helps separate a deep-cleaning job from a restoration job before finishes are applied.
1. Assess the material and the condition
A technician looks at the tile or stone, grout lines, caulking, type of buildup and the area involved. Grease on a kitchen floor is not the same problem as soap scum in a shower. Sound but dirty grout is not the same as grout with gaps. The inspection also helps determine whether existing tile can remain in place while the grout is cleaned or restored.
2. Prepare the work area and clean appropriately
We protect surrounding areas as appropriate, select products for the surface and use professional equipment where suitable. Powered bristle brushes can work accumulated soil out of compatible tile and grout on floors. Shower work may also involve detailing the floor, corners and other areas where buildup gathers. Cleaning and rinsing remove loosened material before any agreed repair or finish.
3. Address damage separately from dirt
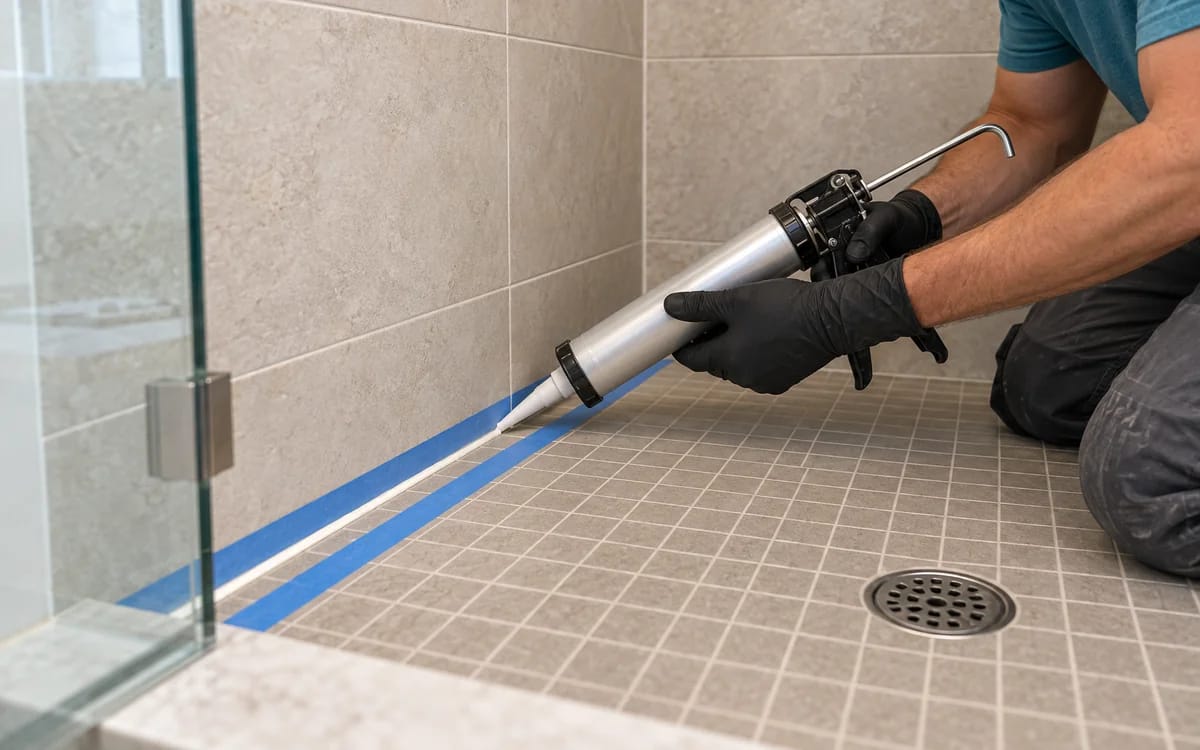
If grout is cracked or missing, the scope may include individual grout-line repairs. If caulk has separated, a new bead should not simply cover the failed one. Proper replacement removes the old silicone, cleans and dries the exposed joint, and applies new caulking suited to the location. A fresh bead is not a fresh start if the failed caulk stays underneath.
This is one reason tile, floor and caulking details deserve attention together. A clean floor with open grout joints still has damaged joints. A bright shower with separated caulk still has a joint that needs proper attention. Getting those details right helps protect the result and makes the aftercare instructions meaningful.
4. Choose a finish only when it fits
Clear penetrating sealing can help compatible, absorbent surfaces resist staining while retaining their existing appearance. It does not hide persistent grout discolouration, and it is not waterproofing. Grout colour sealing refreshes or changes the colour of compatible existing grout and can provide a more consistent appearance. Neither is an automatic add-on for every surface.
Preparation and drying are part of the decision. Applying a finish over remaining dirt or onto a surface that has not dried as required can undermine the outcome. The finish is what you see. The preparation is what you are paying for.
Signs that cleaning alone is not enough
Dark grout is not a diagnosis. Before booking a deep clean or buying another product, check for these distinctions:
- Grout is intact but collects visible dirt: Professional deep cleaning may be the right next step, especially over a large floor or shower.
- Grout is sound but remains uneven in colour after cleaning: Ask whether a colour-sealing assessment makes sense. Clear sealer will not cover the discolouration.
- Grout has holes, cracks or missing sections: Consider restoration or appropriate regrouting. A cleaner cannot rebuild a joint.
- Caulking is peeling, cracking or separating: Assess caulking replacement, whether or not the surrounding tile also needs cleaning.
- Tile is loose, or mould, odour or cracks keep returning: Investigate the underlying condition before assuming surface work will solve it. Cleaning and sealing do not repair hidden leaks or failed underlying waterproofing.
- Natural stone is dull or etched: Determine whether dirt is the issue. Marble with acid etching or scratches generally needs suitable honing or polishing to address the damaged finish, not more cleaning.
For a closer look at a common sticking point, read what to consider when stained grout still looks dark after scrubbing. If visible mould keeps returning around a shower, the location and condition of the material matter more than how many times you have wiped it. Surface treatment cannot establish that hidden mould has been removed.
What can professional work achieve, and what can it not?
For suitable surfaces, deep cleaning can remove accumulated dirt, grease, soap scum and other accessible deposits, giving tile and grout a refreshed appearance. If the main issue is damaged grout, repairs and a suitable colour finish may make the lines look more consistent. Replacing failed caulk can renew the appearance and function of those accessible joints. On compatible materials, sealing can help with stain resistance and future maintenance.
The limitation is just as important: cleaning will not fill missing grout, colour sealing will not correct a loose tile, and a surface sealer will not turn a failed shower assembly into a waterproof one. Mould-resistant caulking does not mean mould can never return. If a shower has a persistent smell, repeated cracking or recurring visible mould, further investigation may be necessary.
What homeowners have seen
Google reviewer Nick G described a shower restoration by technician Antonio this way: “The tiles shine, the grout was filled in and it was re-caulked.” That result involved more than cleaning. In another Google review, Francis Hsue described work in a main shower room that included cleaning, sealing and re-caulking. The exact scope matters when you compare a finished shower with a cleaning-only quote.
For floors, Google reviewer Michele Khandelwal reported that our crew worked on an entire main floor and four bathrooms, saying, “Everything looks brand new again.” These are individual customer experiences, not a promise that every tile or grout line can be returned to its original condition. They do show why assessing the whole area, rather than judging one grout line in isolation, can be worthwhile.
Time, curing and what you need to do
There are several separate clocks: arranging the assessment, carrying out the work, allowing materials to cure, and returning the surface to normal use. A short appointment to review a shower is not the same thing as a confirmed work date, and a finished-looking surface is not necessarily ready for water or foot traffic.
- Assessment and scheduling: Request a free video quote or on-site assessment. Which option is appropriate depends on the surface, location and availability. Share the main facts once, then confirm the appointment details during follow-up before treating the visit as booked.
- Shower deep cleaning: Most residential showers are described as a half-day job when the grout is sound and cleaning is the appropriate scope. If a sealer is applied, wait for the technician’s specific wet-use instructions.
- Grout restoration or full shower restoration: Many residential projects are described as usually taking one day. Repairs, colour sealing and caulking can change the sequence and the time before use.
- Caulking replacement: The work is described as taking a few hours. A shower is typically reusable the next day, subject to the particular sealant’s cure instructions.
- Sealer curing: Our tile-and-grout cleaning guidance states a four-hour cure without foot traffic for its standard clear-sealer process. Separate clear-penetrating-sealer guidance calls for at least 12 hours of drying after cleaning before application, potentially about four hours with air movers, followed by another 12 hours of drying after application, or at least six hours without foot traffic. These are different service sequences, so follow the directions for the treatment actually used.
Before the visit, clear toiletries, mats and small belongings from the area, and make the relevant floor or shower accessible. Tell us about known loose tile, leaks, recurring mould, past coatings or cleaners that may affect the work. We handle the agreed surface preparation, cleaning, applicable repairs or finishing, and cleanup. Your main job afterward is to respect the stated cure time, keep the area out of use as directed, and use cleaners appropriate for the finished surface.
How much does it cost to hire a professional?
There is no useful single price for “grout cleaning” without defining the work. A small shower with sound grout, a large greasy kitchen floor, and a shower needing grout repairs plus complete caulking replacement do not have the same scope. Tile type, area, buildup, access, grout damage and the selected finish affect a quote.
Compare what is included before comparing totals. Two quotes. Same service name. Very different work underneath. Ask which surfaces will be cleaned, whether damaged grout or failed caulk is included, what sealer or colour treatment is proposed, and how long the floor or shower must stay out of use. If you are weighing the expense against continued DIY cleaning, include your time and the possibility that cleaning alone may not address the defect you can see.
Our guide to grout cleaning costs in Toronto explains the factors in more detail. The assessment establishes what your property needs; the quote establishes the proposed work and price. That is more useful than an exact-looking number based on a photograph of one corner.
Best practices for a result that lasts
- Separate maintenance from repair. Clean sound grout regularly, but do not keep scrubbing a hole or a cracked joint as though it were a stain.
- Match the product to the material. Natural stone, grout and manufactured tile do not all respond to the same cleaner. Marble, limestone and travertine need particular care around acidic products.
- Pay attention to adjoining caulk. A clean shower still needs sound joints. Check corners, the tub or base perimeter, and other caulked connections for gaps or separation.
- Know what a sealer does. Suitable sealing can help resist staining, but it is not immunity from every stain, a cure for etching, or a repair for hidden moisture problems.
- Protect the work during curing. Do not walk on a newly treated floor or use a shower before the specified return-to-use time. Check the instructions for the actual product and service, rather than assuming all sealers and caulks cure alike.
- Keep the finish maintainable. Remove routine buildup with compatible cleaning products and follow the aftercare given for your surface. If damage or recurring moisture appears, ask about the cause rather than masking it with another finish.
How to get an answer for your own tile and grout
You do not need to decide whether to buy deep cleaning, grout restoration or caulking replacement before contacting us. Request a free video quote or on-site assessment, whichever fits your location, availability and the surfaces involved. This is one next step with two possible assessment formats: first establish the condition, then review a scope and price for the work that makes sense.
To make that conversation useful, have your address or area, contact details, the surfaces involved, and a rough size or number of showers ready. Describe what you see: dark grout, missing pieces, buildup, peeling caulk or something else. Mention whether ordinary cleaning has helped and whether there is a persistent odour, known leak or repeated cracking. Wide photos and close-ups of grout lines can support the assessment; several service requests allow up to five photos. Photos help us prepare but may not replace a video or on-site review.
After you send an enquiry, expect follow-up to discuss the appropriate assessment format and arrange a time. An enquiry is not a confirmed appointment: confirm the date and format with our team. Have the affected surfaces accessible for the review. The assessment should clarify which condition is being addressed and which surfaces are involved; the resulting quote should identify the proposed cleaning, repairs, caulking or sealing, along with the price and relevant return-to-use guidance. If you submit a written-quote request, treat it as a request for review and follow-up, not an instant exact price from limited information. If you have already shared the key details, there is no need to start the explanation from scratch when the appointment is arranged.
Frequently asked questions
Is professional grout cleaning worth it if I have already tried scrubbing?
Often, yes, if the grout is intact and embedded buildup remains or the area is too large to clean thoroughly by hand. First check for cracks, missing grout and failed caulk. If those are the real problems, restoration or caulking replacement may be more useful than a deeper clean.
Can professional cleaning make grout look new?
It can significantly refresh suitable grout when dirt is the cause of the dark appearance. Cleaning cannot recreate missing material or guarantee uniform colour where the grout is stained or worn. Repairs and colour sealing are separate options to assess when appropriate.
Can I clean grout with vinegar or a strong bathroom descaler?
Do not assume either is suitable. Acidic products can etch marble, limestone and travertine, and a strong product may be incompatible with the grout or an existing finish. Identify the material, choose a compatible cleaner and follow its instructions. Do not mix cleaning products.
Does steam cleaning repair mouldy caulking or cracked grout?
No. Steam cleaning can address buildup on suitable accessible surfaces, but it cannot replace missing grout or remove mould embedded within old silicone. Failed caulking needs appropriate removal and replacement, while recurring mould or odour may call for investigation beyond surface cleaning.
Should I seal grout after cleaning?
It depends on the material, condition and result you want. Clear penetrating sealing can help compatible absorbent grout resist staining without changing its intended appearance. Colour sealing is for suitable grout that needs a refreshed or more consistent colour. Neither treatment automatically suits every installation, and clear sealing is not waterproofing.
How soon can I walk on a professionally cleaned floor or use the shower?
Ask for the service-specific instructions before work begins. Our standard tile-and-grout cleaning guidance describes four hours without foot traffic during its clear-sealer cure. Other clear-sealer processes require additional drying before and after application. Caulking work may take a few hours, but the shower is typically reusable the next day, subject to the sealant used. Shower cleaning and restoration also require wet-use guidance matched to the finish.
Can you tell what I need from photos alone?
Photos can show the overall area and close-up condition, and they are useful when preparing an assessment. They may not establish the tile material, depth of grout damage or condition of a joint well enough to settle the scope. A video or on-site review may be needed before the work and price are confirmed.
What if the tile is sound but the caulking is failing?
You may only need caulking replacement, rather than a full shower restoration. The old silicone should be removed completely, the joint cleaned and dried, and a suitable new bead applied. The assessment can also determine whether nearby grout needs separate attention.
The practical choice
Use DIY cleaning for manageable, lightly soiled areas with intact grout and a known surface. Choose a professional assessment when cleaning has stalled, the area is extensive, the material needs careful handling, or you see cracks, gaps or failed caulking. The best outcome is not the most elaborate treatment. It is a refreshed, maintainable surface with the right work done in the right places.
Before you buy new tile or another grout cleaner, get an answer about the tile you already own. For homeowners in Toronto and suitable GTA service areas, Team Grout can arrange a free video quote or on-site assessment and explain the proposed scope before you decide what to spend. Call 289-277-0228 or email info@teamgrout.ca to start that conversation.